Scenario:
Make: Git for Windows
Operating System: Windows 10 and Windows 11
Mode: GUI [Installer] and CLI [winget]
Description: In this article, we will discuss a stepwise method of how to install Git on Windows 10 or Windows 11, which options to choose in each installer screen, and how to verify and configure Git after installation.
Git is a free, open-source version control system that tracks changes to your files and lets you work with services such as GitHub, GitLab and Bitbucket. On Windows, it is installed with Git for Windows, which also includes Git Bash, a terminal with common Linux commands.
Using Linux instead? Follow How to Install Git on Linux.
Prerequisites
- A Windows 10 or Windows 11 computer with an internet connection.
- Administrator rights, unless you install Git only for your own user account.
- About 300 MB of free disk space.
Quick Method: Install Git with winget
Windows 10 and 11 include the winget package manager. Open PowerShell or Command Prompt and run:
winget install --id Git.Git -e --source wingetThis installs Git with the recommended default settings. Close and reopen the terminal afterwards, then jump to Verify the Installation below. If you prefer to choose each option yourself, use the installer method.
Installer Method: Step by Step
Step 1: Download Git for Windows
Go to the official download page at git-scm.com/download/win and download the installer. Most computers need the 64-bit version; choose ARM64 only if your PC has an ARM processor.
Step 2: Run the Installer
Open the downloaded .exe file. There is nothing to extract. Click “Yes” if Windows asks for administrator permission.
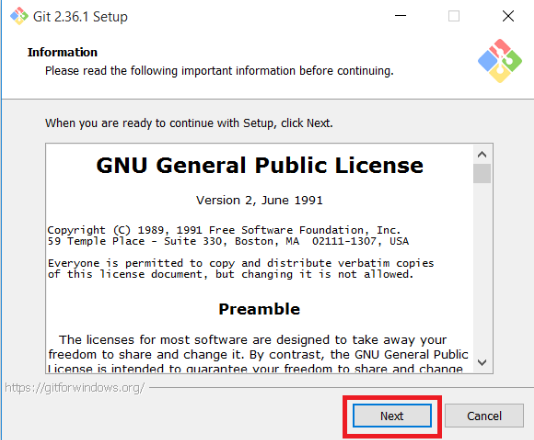
Step 3: Accept the License
Read the GNU General Public License and click “Next”.
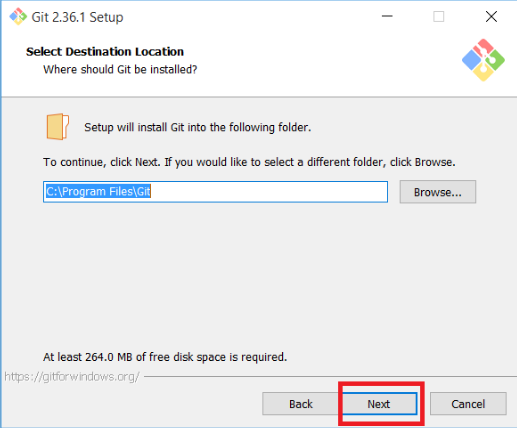
Step 4: Choose the Installation Location
Keep the default folder (C:\Program Files\Git) unless you have a specific reason to change it, and click “Next”.
Step 5: Select Components
The defaults are fine for most users. They include Git Bash, Git GUI and Windows Explorer integration, so you can right-click a folder and open Git Bash there. Click “Next”.

Step 6: Start Menu Folder
Keep the default and click “Next”.

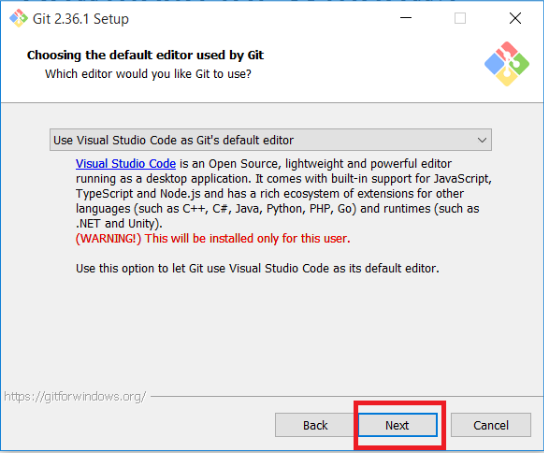
Step 7: Choose the Default Editor
Git opens this editor for commit messages. The default is Vim, which can be confusing for beginners. If you are new to Git, choose Nano, Notepad or Visual Studio Code if you use it. Click “Next”.
Step 8: Initial Branch Name
This sets the name of the first branch in new repositories. We recommend selecting “Override the default branch name” and entering main, which matches GitHub and GitLab. Click “Next”.

Step 9: Adjust the PATH Environment
Keep the recommended option, “Git from the command line and also from 3rd-party software”. This lets you use Git from Command Prompt, PowerShell and tools such as VS Code. Click “Next”.

Step 10: SSH Executable
If this screen appears, keep the default, “Use bundled OpenSSH”, and click “Next”.
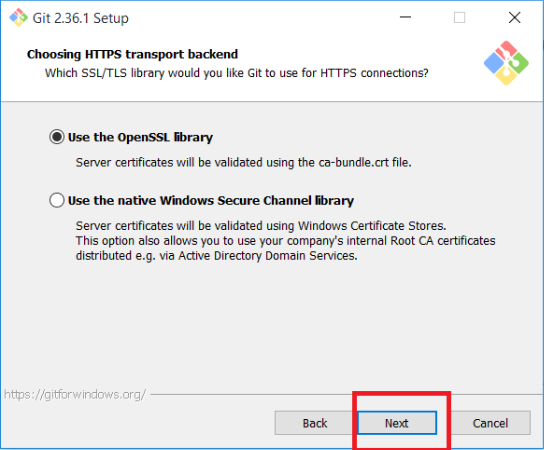
Step 11: HTTPS Transport Backend
Keep “Use the OpenSSL library” for home use. In a company network that uses its own certificates, choose “Use the native Windows Secure Channel library” instead, as it trusts the certificates already installed on your computer. Click “Next”.
Step 12: Line Ending Conversions
Windows and Linux use different characters at the end of each line. Keep the default, “Checkout Windows-style, commit Unix-style line endings”, and click “Next”.

Step 13: Terminal Emulator
Keep “Use MinTTY” for a better Git Bash window. Choose “Use Windows’ default console window” only if you prefer the classic Command Prompt look. Click “Next”.

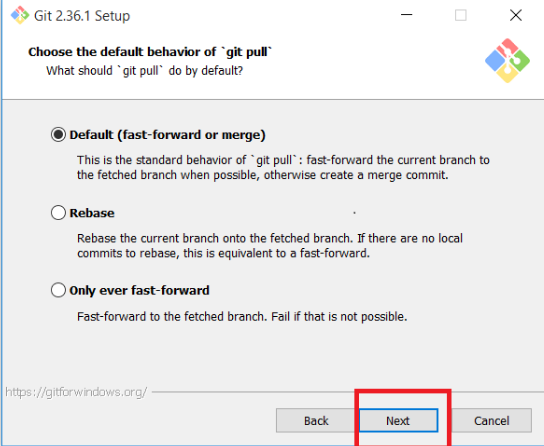
Step 14: Default Behaviour of git pull
Keep the default, “Fast-forward or merge”, and click “Next”.
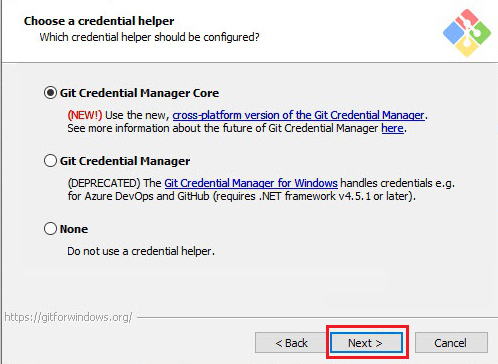
Step 15: Credential Helper
Keep “Git Credential Manager”. It lets you sign in to GitHub through your browser and remembers your login securely, so you do not need to enter a Personal Access Token every time. Click “Next”.
Step 16: Extra Options
Keep “Enable file system caching” ticked for better performance, and click “Next”.

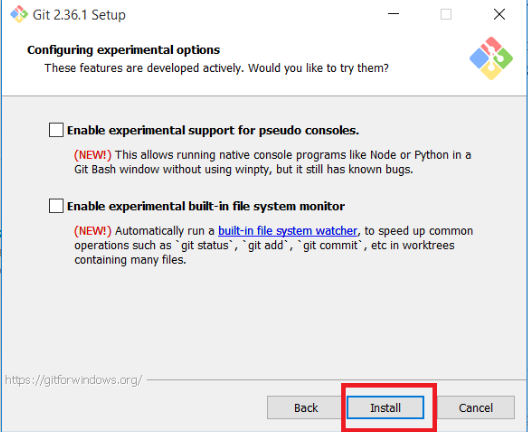
Step 17: Experimental Options and Install
Leave experimental options unticked and click “Install”. When it finishes, click “Finish”.
Verify the Installation
Open a new Command Prompt, PowerShell or Git Bash window and run:
C:\> git --version
git version 2.x.x.windows.1
If you see a version number, Git is installed correctly.
Important Note: If you get “git is not recognized as an internal or external command”, close and reopen the terminal. If it still fails, run the installer again and make sure the recommended PATH option in Step 9 is selected.
Configure Your Name and Email
Git records your name and email with every commit. Set them once:
git config --global user.name "Your Name"
git config --global user.email "you@example.com"
git config --list
Use the same email as your GitHub account if you use GitHub. Git is now ready. Next, learn How to Clone a Repository from GitHub.
How to Update Git on Windows
Run either of these commands:
git update-git-for-windows

winget upgrade --id Git.Git
Frequently Asked Questions
Is Git free on Windows?
Yes. Git for Windows is free and open source.
What is Git Bash?
Git Bash is a terminal installed with Git for Windows. It lets you run Git and common Linux commands such as ls, cat and ssh on Windows.
Do I need GitHub Desktop?
No. GitHub Desktop is an optional graphical app. Git itself, installed with this guide, works from the command line and with editors such as VS Code.
Disclaimer: This article is for educational purposes only and is not professional financial, medical, or legal advice. It may contain affiliate links, which earn us a small commission at no extra cost to you. See our Disclaimer and Affiliate Disclosure.
Article ID: EA00131