Introduction
Telnet is an abbreviation of Terminal Network. Telnet provides connections to the remote computer in such a way that a local terminal appears to be at the remote site. Here we will discuss how to enable telnet service on Windows 10 machines i.e. on laptops or desktops.
In Microsoft Windows 10 machines the Telnet Client service remains disabled and whenever required it can be easily enabled. It is a very useful and widely used service. Follow the steps mentioned below to enable Telnet Client on Windows 10 machines i.e. laptops or desktops.
Configuration
Step1: Control Panel
Navigate to the control panel of the machine [laptop or desktop]. You could search the control panel using the search bar as shown below in the image.
Step2: Programs
Click “Programs” to move to the next page.
Step3: Windows Features
Click “Turn Windows features on or off” as shown below in the image. You might get an admin credential pop up to access it, depending upon the applied policies.
Step4: Enable Telnet Client
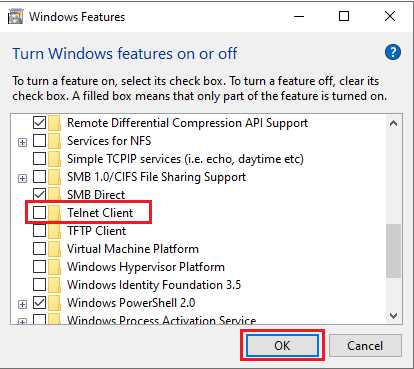
As soon as “Turn Windows features on or off” is clicked, you would see a pop of “Windows Features“. Scroll down at the bottom till you see “Telnet Client” as shown below in the image. Check the box to enable the service and click “OK” to save the change.
Step5: Confirmation
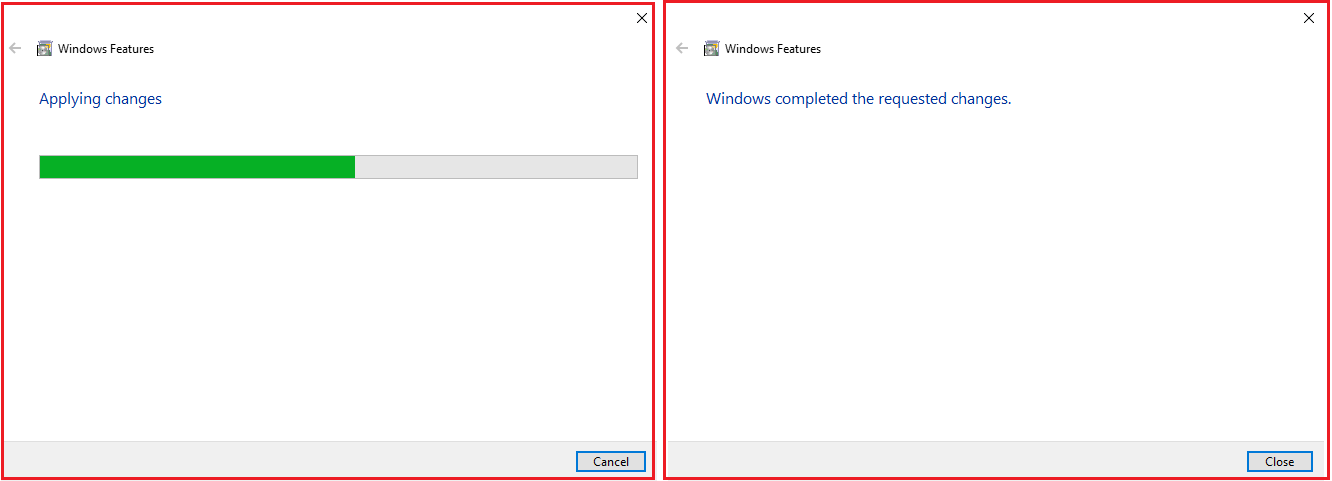
As soon as “OK” is clicked you could see the status and then confirmation.
Close the pop-up. Telnet is now enabled on Windows 10 machine. Reboot is not needed but it is always recommended to reboot the laptop/desktop after any applied changes.
Do not forget to refer to the articles if you are looking to Check & Change the SSH Version Of Cisco Switches or Configure SSH On Cisco ASA Firewall. Sometimes Microsoft Outlook Show Emails Of Past One Year Only that can be changed and then you could see all of your emails.
Source: Knowledge Base, Internet, Microsoft
EA00094


