
Scenario:
Make: Cisco
Model: ASA 5506-X, ASA 5506 W-X, ASA 5508-X, Cisco ASA 5500 Series
Mode: GUI
Version: ASA version 9.x or later, ASDM version 7.x or later
Description: In this article, we will discuss the stepwise method of how to resolve the issue when the Policy Based Routing or PBR on Cisco ASA Firewalls does not work as expected with the PPPoE internet line. PBR is used to route the traffic on different criteria and you could route traffic of an interface or vlan via dedicated internet line.
Problem
Sometimes it happens, the routing of a particular vlan or interface or subnet does not work as expected after applying PBR especially with the PPPoE internet line on Cisco ASA. Refer to the article below to understand how to configure PBR.
Solution
If you have the internet line with the static IP then the PBR configuration as mentioned in the above article will help but if you are having internet line which supports DHCP or PPPoE then the routing will not work as expected. To resolve the issue, follow the steps as mentioned below.
This can also be used for the internet having static IP. This basically helps to route the traffic over interface rather over assigned next hop IP.
Step1: Login
Login to the ASA using username and password through ASDM.

Step2: Route Map
Navigate to Route Map and then click “Add”. Follow the steps shown in the image below.

Step2a: Match Clause
Name the route map and define the sequence. Also, create the access list for the route policy.

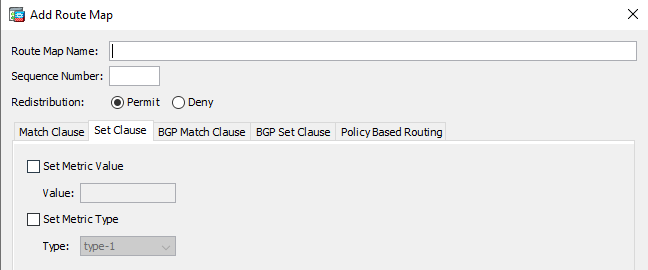
Step2b: Set Clause
You could leave the settings here as default settings unless you need to change them.
Step2c: BGP Match Clause
If you are using BGP then configure the options as per requirement, else leave the setting as default if you are not using BGP.

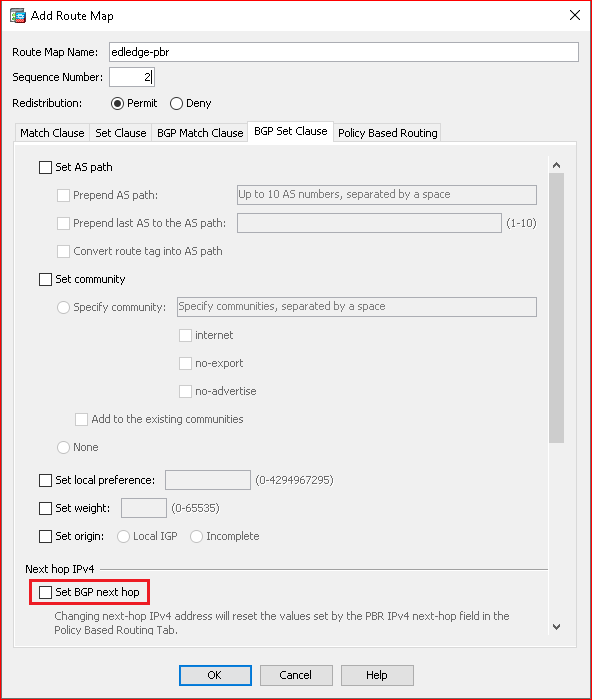
Step2d: BGP Set Clause
Leave the “Set BGP next hop” unchecked here.
Step2e: Policy Based Routing
Scroll down and search for “Set interfaces“. Click the three dots as shown in the red box in the below image and add the interface of the secondary ISP i.e. outside1. Follow the steps shown below in the image.
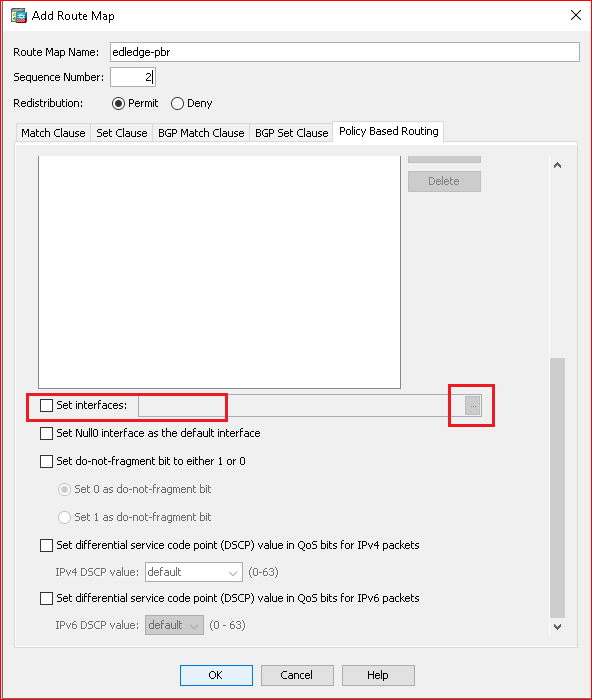
If you have static IP for your internet line then you could define the next hop IP as the gateway of the internet line, but in case you have PPPoE internet connection then you will have to select interface to route the traffic irrespective of the gateway IP of internet line.
Other Important Topics
- Configure IP SLA on Cisco ASA Firewalls
- Cisco ASA Logging/Syslog Time Sync Issue
- Configure Redundant or Backup ISP Link on Cisco ASA – CLI
- Password Change Of Cisco ASA FirePower or SFR Module
- Default Username & Password Of Cisco ASA FirePower/SFR Module
[ays_quiz id=’2′]
Source: Cisco, Knowledge Base, Internet
EA00154
