
Scenario:
Make: Cisco ASA
Model: ASA 5506-X, ASA 5506 W-X, ASA 5508-X, Cisco ASA 5500 Series
Version: ISO 7.0 and above
Mode: GUI (Graphical User Interface)
Description: In this article, we will discuss the stepwise method to configure a Site-to-Site IPSec VPN tunnel on a Cisco ASA Firewall. We will use here Graphical User Interface [GUI] method for the configuration. This can be configured via CLI or Command Line Interface as well.
Configuration
Step1: ASA Access
Access the Firewall using the username and password through ASDM.

Step2: Navigate To Configuration
Navigate to the “Configuration” page and then to the “Site-to-Site VPN” tab. Once reached the page click “Add“. Follow the steps shown below in the image
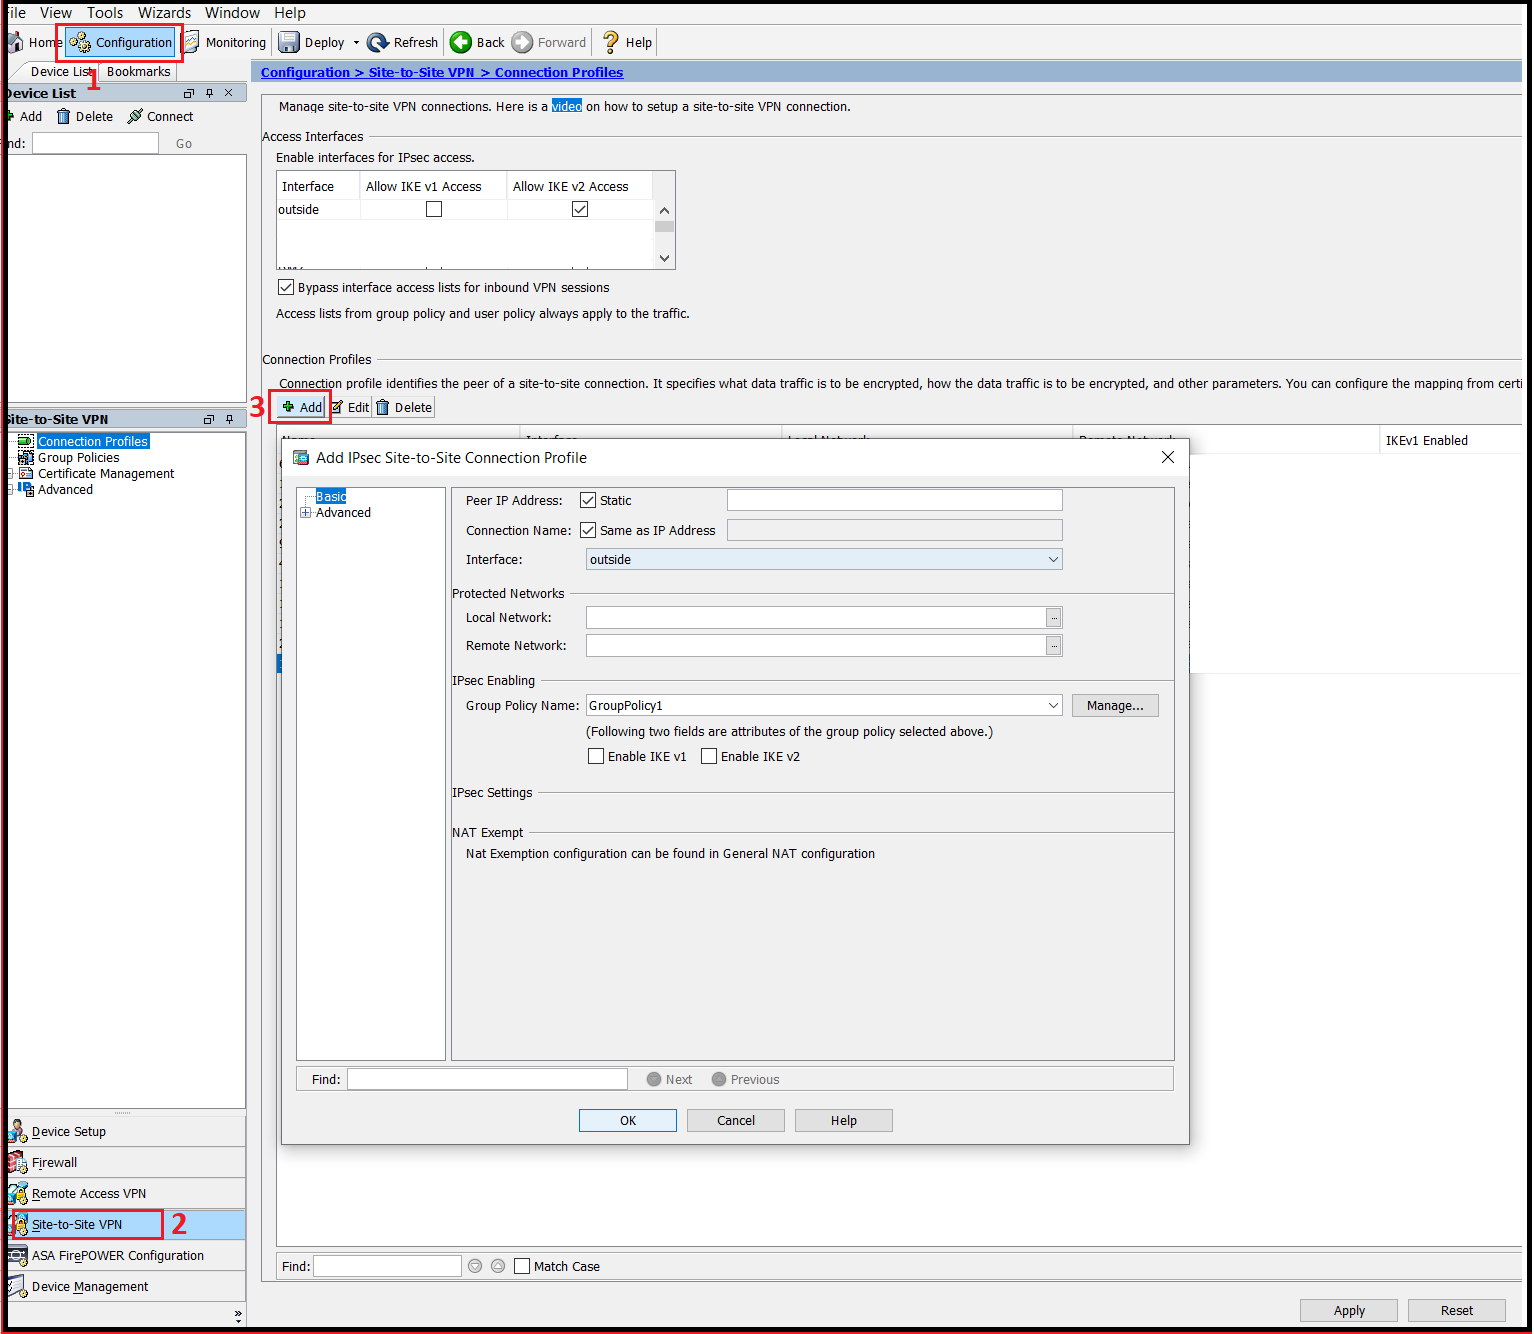
Step3: IPSec Profile Configuration
IPSec Site-to-Site VPN tunnel configuration contains many steps, hence we will discuss here each step in detail. All steps of the first page of configuration is shown below in the image.
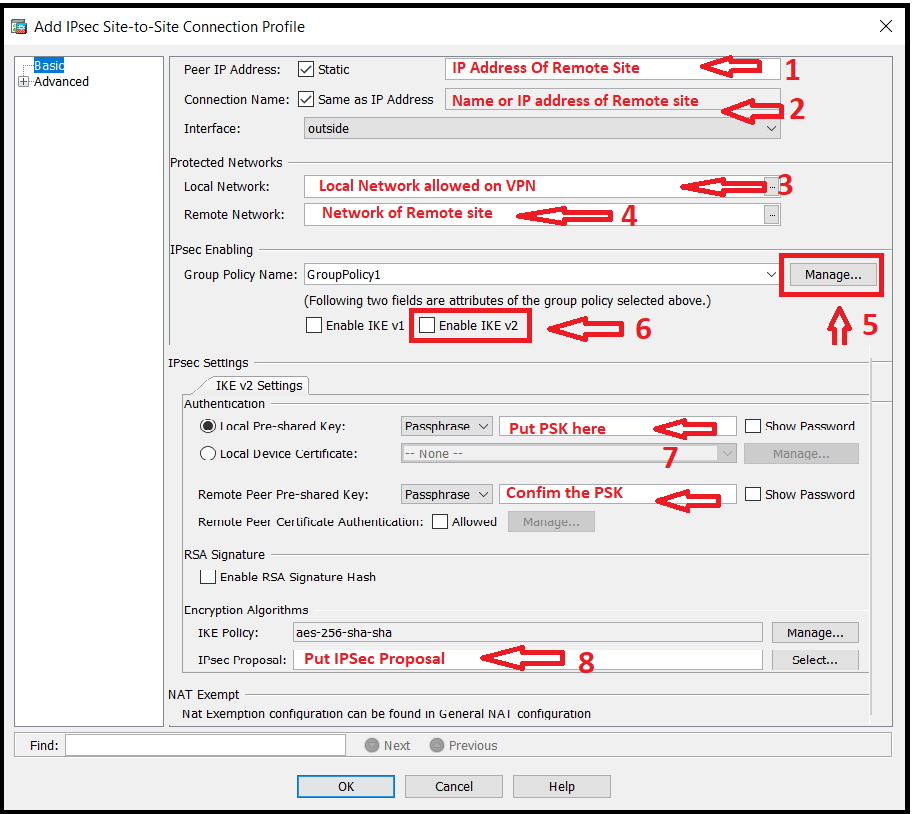
Step3a: IP Address
Put the IP address of the remote site or the far end, where we want to connect the site through the IPSec Site-to-Site VPN tunnel.
Step3b: Interface
Configure the interface for the connection. Generally, the WAN or Outside interface is used for the VPN connection.
Step3c: Protected Networks
Add the subnets or IPs of the Local site and the remote site which are allowed to communicate via IPSec tunnel. These subnets/IPs will be considered as Protected Network.
Step3d: Group Policy
Configure the group policy and add the public IP, enable IKEv2 and modify other options as per requirement. Detail is shown below in the image for Group Policy.

Step3e: PSK
Add the Pre-shared Key for local and remote site. Keep it safe somewhere as the same PSK would need to add at the remote site. Mismatched or wrong PSK will not allow VPN to get connected.
Step3f: IPSec Proposal
Add the IPSec Proposal as per requirement or company policy.
Step4: Advanced Setup
Click “Advanced” and navigate to “Crypto Map Entry“. Options are shown below in the image and described as well.

Step4a: Priority
Define the priority of the VPN tunnel. Lower the number, highest the priority.
Step4b: NAT & Reverse Route
Enable or disable NAT Transversal and Reverse Route as per requirement.
Step4c: SA Lifetime
Define the Security Association Lifetime as per requirement or company policy.
Step5: Tunnel Group
Navigate to Tunnel group and configure as per requirement. Options of Tunnel Group are shown below and discussed as well.
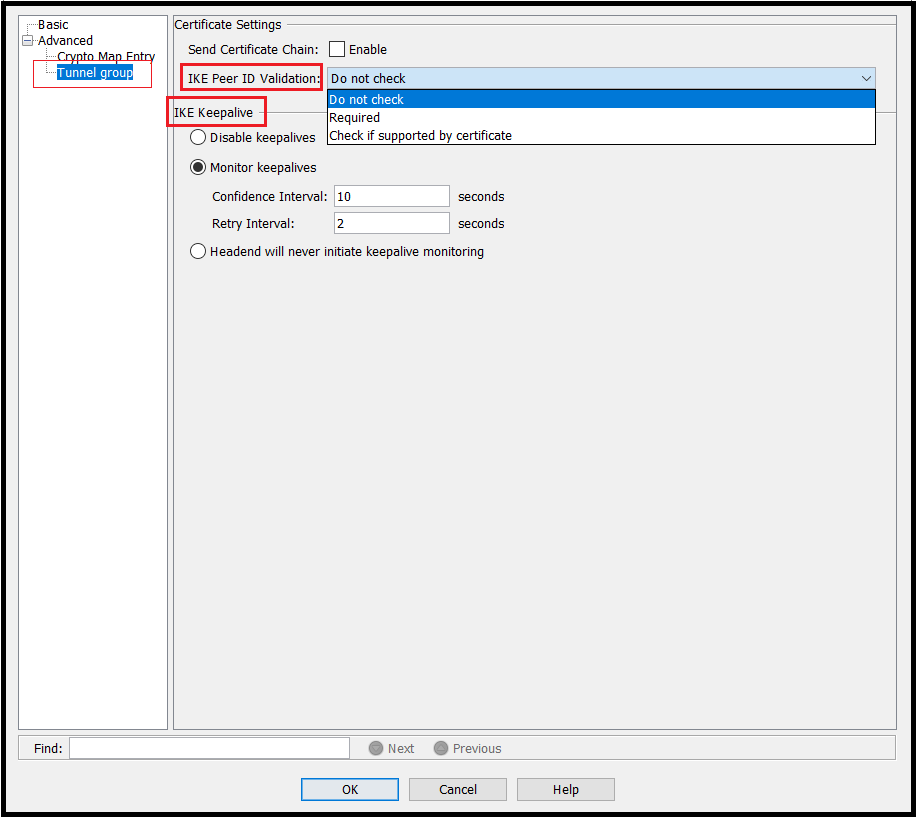
Step5a: ID Validation
Select one of the available options for the IKE IP Peer validation as per requirement or company policy
Step5b: Keep Alive
Enable or disable keep alive as per requirement. If Keep Alive is enabled then define the “Confidence Interval” and “Retry Interval“.
If the far end also has the Cisco ASA then follow the same steps to configure the VPN tunnel at the far end. Once both ends have the configuration, the IPSec VPN tunnel should be up and connected.
In case you are having issues in configuring ASDM Access and/or SSH Access of Cisco ASA please follow the attached link. Also if you looking to upgrade the IOS image or firmware of Cisco ASA do not forget to see the article Cisco ASA Firmware upgrade-CLI and Cisco ASA firmware upgrade-GUI.
Source: Cisco, Knowledge Base, Internet
EA00069