Scenario:
Make: Microsoft
Operating System: Windows 10 and Windows 11 [Pro, Enterprise, Education]
Mode: GUI [Graphical User Interface] and PowerShell
Description: In this article, we will discuss a stepwise method of how to install and set up an FTP server on Windows 10 or Windows 11 using the built-in IIS FTP service, create a user, allow it through Windows Firewall, and test the connection.
Introduction
FTP (File Transfer Protocol) is a simple way to share files between computers on a network. It is still widely used by network engineers, for example to copy firmware, configuration backups or logs to and from switches, firewalls and other devices. FTP uses TCP port 21 for commands and a separate connection for the data itself.
Windows already includes an FTP server as part of IIS (Internet Information Services). You only need to switch it on and configure it; no extra software is required.
If you also need Telnet for testing network connections, see How to Enable Telnet on Windows 10.
Prerequisites
- A Windows 10 or Windows 11 computer with an administrator account.
- A folder you want to share over FTP, for example C:\FTP.
- The computer’s IP address. Run ipconfig in Command Prompt to find it.
Part 1: Enable the FTP Server Feature
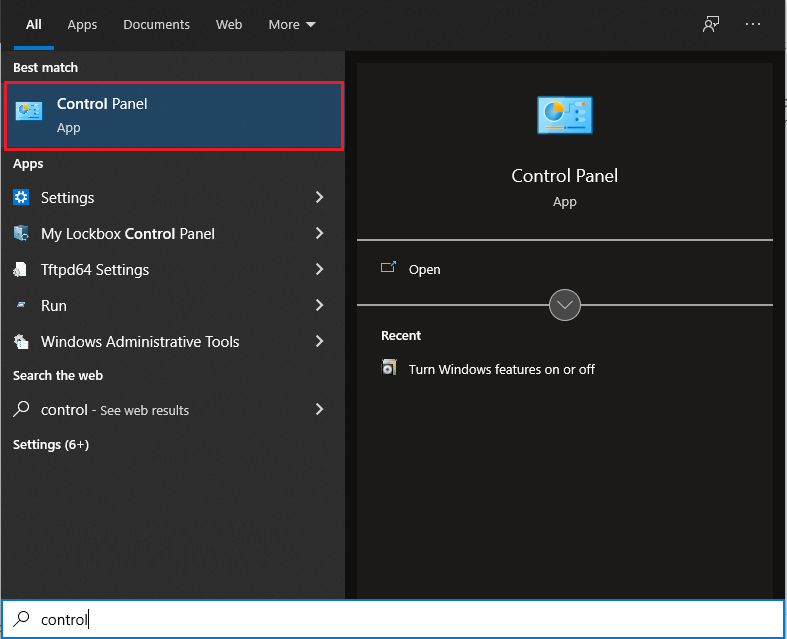
Step 1: Open Control Panel
Open Control Panel from the Start menu.
Step 2: Open Programs
Click “Programs”.

Step 3: Open Windows Features
Click “Turn Windows features on or off”. You may be asked for administrator credentials.

Shortcut: press Win + R, type optionalfeatures and press Enter.
Step 4: Select the FTP and IIS Components
Expand “Internet Information Services” and tick the following:
- FTP Server > FTP Service and FTP Extensibility
- Web Management Tools > IIS Management Console
Click “OK”.

Important Note: Do not forget IIS Management Console. Without it, the IIS Manager tool used in Part 3 will not be available.
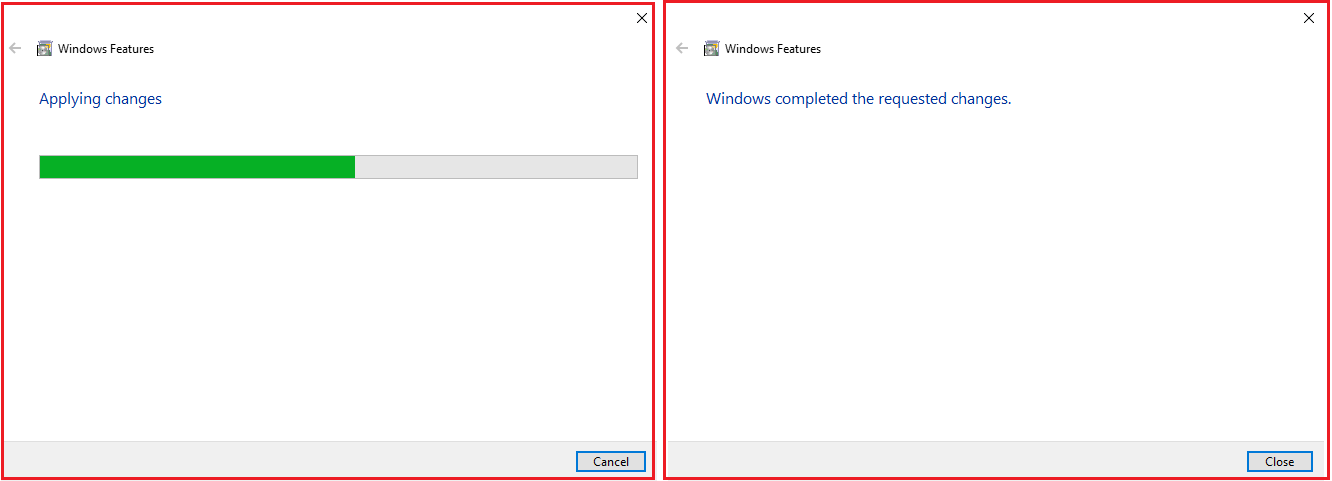
Step 5: Wait for Confirmation
Windows installs the components and shows a confirmation when it is finished.
Alternative: Enable FTP with PowerShell
You can install the same components with one command in PowerShell run as administrator:
Enable-WindowsOptionalFeature -Online -FeatureName IIS-FTPServer,IIS-FTPSvc,IIS-FTPExtensibility,IIS-ManagementConsole -AllPart 2: Create an FTP User and Folder
With Basic authentication, FTP users sign in with a Windows account. It is best to create a dedicated local account for FTP rather than using your own login. In Command Prompt run as administrator:
net user ftpuser Str0ngPassw0rd! /addCreate the folder you want to share (for example C:\FTP), right-click it, select “Properties” > “Security” > “Edit”, add ftpuser and give it Modify permission if users need to upload files, or Read for download only.
Part 3: Configure the FTP Site in IIS
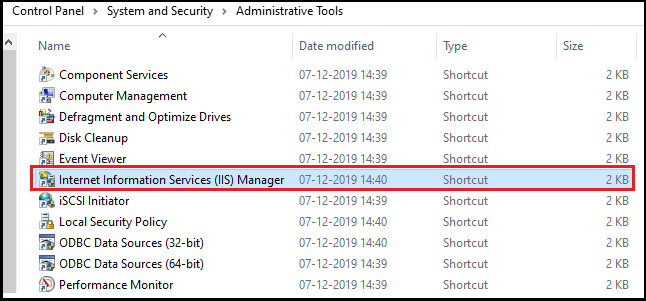
Step 1: Open Administrative Tools
Search for “Windows Tools” (Windows 11) or “Administrative Tools” (Windows 10) in the Start menu and open it as administrator.

Step 2: Open IIS Manager
Double-click “Internet Information Services (IIS) Manager”. You can also press Win + R, type inetmgr and press Enter.
Step 3: Add an FTP Site
In the left pane, expand your computer name, right-click “Sites” and select “Add FTP Site”.

Step 4: Enter the Site Information
Enter a name for the site (for example edledge-FTP) and select the physical path of the folder you created in Part 2, such as C:\FTP. Click “Next”.

Step 5: Set the Binding and SSL Settings
Configure the following, then click “Next”:
- IP Address: select the computer’s IP address, or leave “All Unassigned”.
- Port: keep the default 21.
- Start FTP site automatically: ticked.
- SSL: choose “No SSL” for a quick test on a trusted local network. For anything else, choose “Allow SSL” or “Require SSL” and select a certificate, so that passwords and files are encrypted (FTPS).
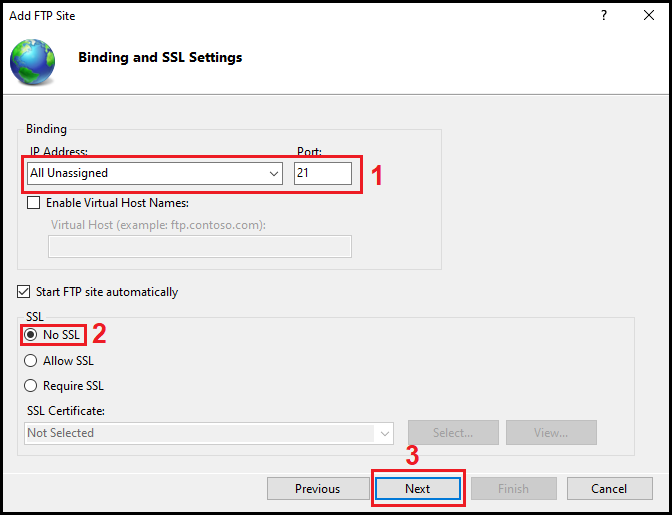
Important Note: Without SSL, FTP sends usernames, passwords and files in plain text. Use “No SSL” only on a trusted internal network, never over the internet.
Step 6: Set Authentication and Authorization
Set the following and click “Finish”:
- Authentication: tick “Basic”. Leave “Anonymous” unticked unless you really want anyone to connect without a password.
- Authorization: select “Specified users” and enter ftpuser.
- Permissions: tick “Read”, and “Write” if the user should be able to upload.

The FTP site is now created and running.
Part 4: Allow FTP Through Windows Firewall
Step 1: Open the Firewall Settings
Open Control Panel > “Windows Defender Firewall” and click “Allow an app or feature through Windows Defender Firewall”. Administrator rights may be required.
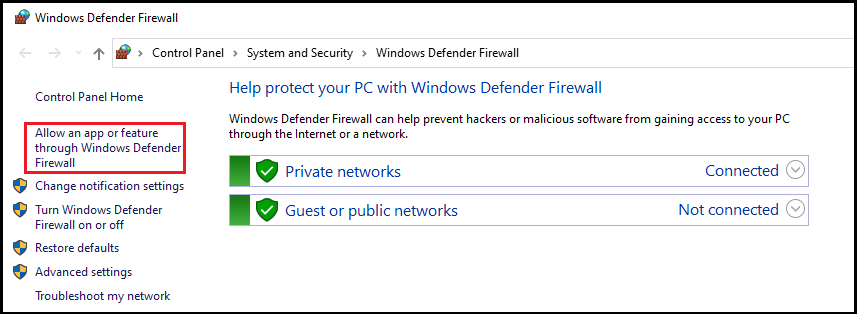
Step 2: Allow the FTP Server
Click “Change settings”, find “FTP Server” in the list and tick it for Private networks. Tick Public only if you have a good reason. Click “OK”.

Part 5: Test the FTP Server
From another computer on the same network, test with the built-in command-line client, replacing the IP address with your server’s:
C:\> ftp 192.168.1.10
Connected to 192.168.1.10.
220 Microsoft FTP Service
User (192.168.1.10:(none)): ftpuser
331 Password required
Password:
230 User logged in.
ftp> dir
ftp> bye
You can also connect with a free FTP client such as FileZilla, or type ftp://192.168.1.10 in the File Explorer address bar. Modern web browsers such as Chrome and Edge no longer support FTP.
Your FTP server is now ready to use.
Troubleshooting
- Cannot connect at all – check that the FTP site shows as Started in IIS Manager, that the Microsoft FTP Service is running in services.msc, and that the firewall rule from Part 4 is enabled.
- “530 User cannot log in” – the username or password is wrong, Basic authentication is not enabled, or the user is not listed under Authorization.
- Login works but listing or uploading fails – check the NTFS permissions on the folder (Part 2) and the Read/Write permissions in IIS.
- Directory listing hangs or times out – this is usually a passive-mode problem when another firewall or a NAT router sits between client and server. In IIS Manager, open “FTP Firewall Support” at the server level, set a data channel port range (for example 50000-50100), and allow that range on the firewall.
- “IIS Manager” is missing – go back to Part 1 and enable IIS Management Console.
Frequently Asked Questions
Does this work on Windows 11?
Yes. The steps are the same on Windows 10 and Windows 11. Only the name of the tools folder differs: Administrative Tools on Windows 10 and Windows Tools on Windows 11.
Which port does an FTP server use?
TCP port 21 for commands. Data uses TCP port 20 in active mode, or a range of high ports in passive mode. FTPS with implicit SSL uses port 990.
Is FTP secure?
Plain FTP is not encrypted. Use FTPS (FTP with SSL/TLS) by selecting a certificate in the SSL settings, or consider SFTP, which runs over SSH, for transfers over untrusted networks.
Disclaimer: This article is for educational purposes only and is not professional financial, medical, or legal advice. It may contain affiliate links, which earn us a small commission at no extra cost to you. See our Disclaimer and Affiliate Disclosure.
Article ID: EA00109