Scenario:
Make: Microsoft
Product: BitLocker To Go (built into Windows)
Version: Windows 10 and Windows 11 – Pro, Enterprise or Education edition
Mode: GUI (Graphical User Interface)
Description: In this article, we will discuss how to encrypt an external hard drive or USB drive with Microsoft BitLocker, so your data stays private even if the drive is lost or stolen.
An external hard drive is an excellent way to back up data. However, it is also risky: if the drive is lost or stolen, anyone who plugs it in can read your files. Encrypting the drive protects your personal and valuable information, because nobody can open it without your password or recovery key.
There are many ways to encrypt a drive, including third-party tools. In this article, we will use BitLocker To Go, the encryption feature built into Windows, so you do not need to install any extra software.
Important Note: Windows Home edition cannot turn on BitLocker for an external drive. It can only unlock and use a drive that was encrypted on a Pro, Enterprise or Education PC. Also, back up important files before you start, in case something interrupts the encryption.
How to Encrypt an External Hard Drive with BitLocker
Step 1: Connect the Hard Drive
Connect your external hard drive or USB drive to the computer and make sure Windows detects it.
Step 2: Locate the Drive
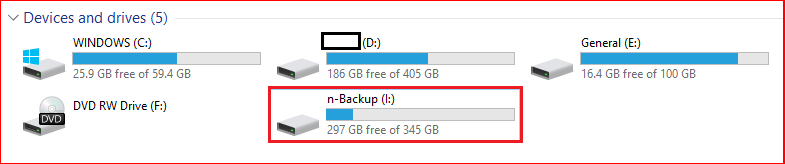
Open “File Explorer” and find the external drive you want to encrypt under This PC.
Step 3: Turn On BitLocker
Right-click the external drive and select “Turn on BitLocker“, as shown in the image below. In Windows 11, you may need to click “Show more options” first.

Step 4: Starting BitLocker
Windows shows the “Starting BitLocker” window while it prepares the drive. Wait a few seconds.

Step 5: Set a Password
Tick “Use a password to unlock the drive“, enter a strong password (at least 8 characters, mixing letters, numbers and symbols) and confirm it. You will need this password every time you connect the drive.

Step 6: Back Up the Recovery Key
Choose how to save your recovery key: Save to your Microsoft account, Save to a file or Print the recovery key. You will need this key if you forget the password.

Important Note: Never save the recovery key on the drive you are encrypting, because you cannot open it once the drive is locked. Keep it in a separate, safe place. Without the password and the recovery key, your data cannot be recovered.
Step 7: Choose How Much of the Drive to Encrypt
Select one of the two options:
Encrypt used disk space only: faster, and best for a new or empty drive.
Encrypt entire drive: slower, but recommended for a drive that already has data, because it also encrypts the free space where deleted files can still be recovered.

Step 8: Choose the Encryption Mode
For an external drive, select “Compatible mode“. This mode works on older versions of Windows as well, so you can use the drive on other computers. Choose “New encryption mode” only if the drive will be used on Windows 10 (version 1511 or later) and Windows 11 computers only.

Step 9: Start Encrypting
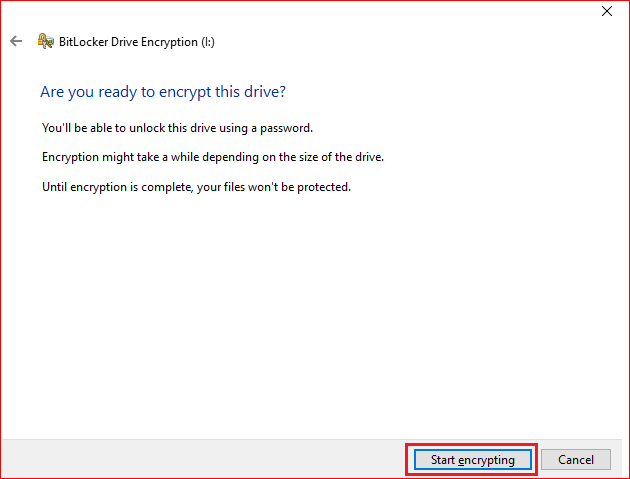
Click “Start encrypting“.
Step 10: Check the Encryption Status
A progress window shows the encryption status, as shown below. Depending on the size of the drive and the option you chose, this can take from a few minutes to several hours. Do not unplug the drive while it is encrypting. If you need to remove it, click Pause first.

Step 11: Completion Confirmation
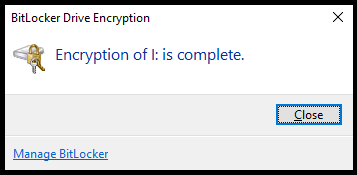
When the drive is fully encrypted, Windows shows a confirmation message, as shown below. The drive icon in File Explorer now has a padlock.
How to Unlock and Manage the Encrypted Drive
When you connect the drive to any Windows computer, Windows asks for the password. Enter it to unlock the drive. To change the password, back up the recovery key again, or turn off BitLocker, right-click the drive and select “Manage BitLocker“.
You can also check the status and unlock the drive from the Command Prompt (run as administrator). Replace E: with your drive letter.
C:\>manage-bde -status E:

C:\>manage-bde -unlock E: -password
Frequently Asked Questions
Can I use BitLocker on Windows Home?
Windows Home cannot turn on BitLocker for an external drive, but it can unlock and use a drive that was encrypted on a Pro, Enterprise or Education PC.
What happens if I forget the BitLocker password?
Use the recovery key you saved in Step 6. If you saved it to your Microsoft account, you can find it by signing in at account.microsoft.com/devices/recoverykey. Without the password or the recovery key, the data cannot be recovered.
Can I open a BitLocker drive on a Mac?
Not natively. macOS cannot read BitLocker-encrypted drives without third-party software. If you need the drive on both Windows and Mac, consider another encryption tool.
Does BitLocker slow down the external drive?
Slightly, but on modern computers the difference is usually not noticeable for everyday use, such as backups and copying files.
Other Important Topics
- Black Screen Issue Over Video Call On Microsoft Teams
- How To Enable & Setup FTP Server on Windows 10 Machines
- How To Enable Telnet Service On Windows 10
- Microsoft Teams Presence Not Showing in Outlook
- How To Digitally Sign a Microsoft Word Document
Disclaimer: This article is for educational purposes only and is not professional financial, medical, or legal advice. It may contain affiliate links, which earn us a small commission at no extra cost to you. See our Disclaimer and Affiliate Disclosure.
Article ID: EA00110