Scenario:
Make: Cisco
Model: All ASA Models [ASA 5506-X, ASA 5506 W-X, ASA 5508-X etc]
Mode: GUI [Graphical User Interface]
Description: In this article, we will discuss in details the stepwise Graphical User Interface [GUI] method to configure SSH access onto the Cisco ASA. We can Configure SSH through CLI [Command Line] method as well onto the Cisco ASA.
When we configure an ASA, we need to enable SSH and ASDM access for management and maintenance of the Firewall remotely. Here we will discuss, how to configure SSH on an ASA via ASDM. This configuration method is valid for both standalone and failover ASA units. In Failover mode the active firewall will be accessible over SSH.
Configuration
Step1: Firewall Access
Access the firewall via ASDM using the IP address or hostname and the password.
Like without having config we can gain CLI access to the ASA via console. Similarly, GUI access can be gained by accessing ASA using the default IP address https://192.168.1.1 when ASA is connected locally.
[ays_quiz id=’2′]
Step2: Allow SSH
Add the subnet(s) or IP(s) address that is (are) allowed to access the ASA over SSH. We would need to define the interface of the ASA as well as on which SSH will be allowed. Follow the steps as shown below in the image.
Step3: Generate RSA
Once the SSH is allowed and also the IPs/Subnets are added which could access the Firewall over SSH, It’s time to generate RSA keys to authenticate the SSH connection. Follow the steps shown below in the image.
Step5: Enable AAA
Enable AAA for the local database. Follow the steps as shown below in the image.
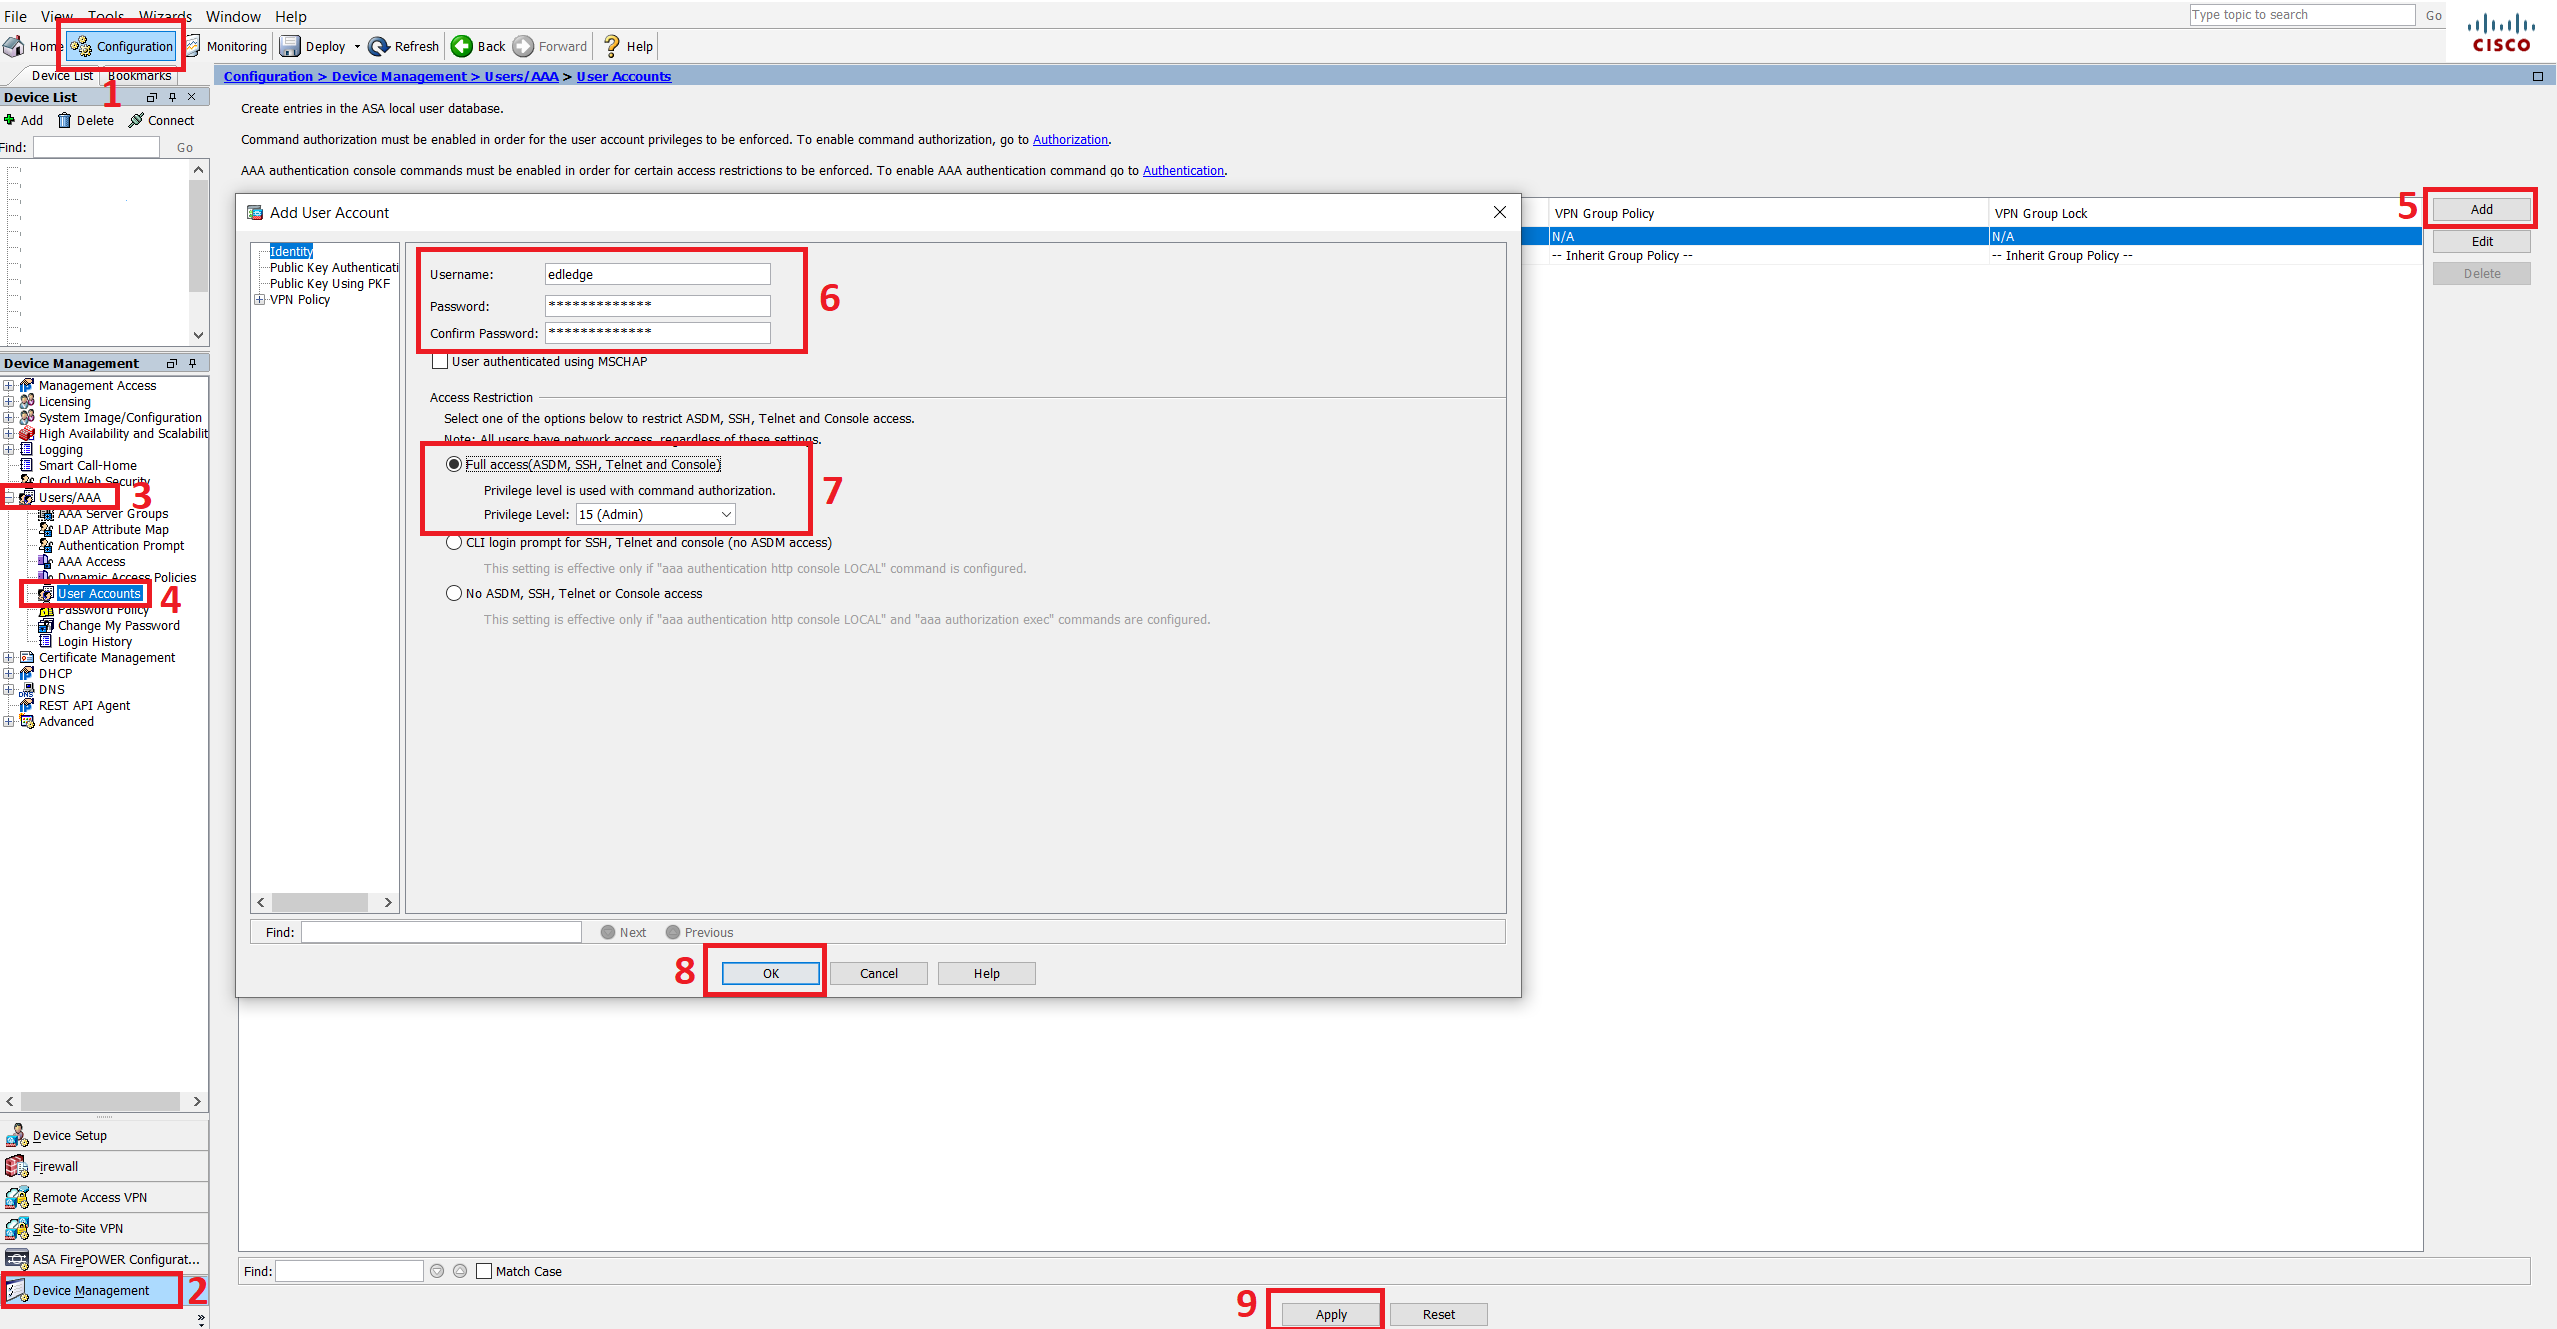
Step6: Add User
Add user to the local database to allowed by AAA for SSH connection. Follow the steps as shown below in the image.
ASA is now all set to access over SSH. Use putty to SSH onto the ASA either using hostname or IP address of the ASA.
Sometimes we face issues when we SSH onto the ASA. Follow the attached article to know the solution of the Error when SSH onto ASA Firewall. Do not forget to refer to other interesting articles on Cisco ASA Firewalls on this website.
Source: Cisco, Knowledge Base, Internet
EA00063


