
Scenario:
Make: Zabbix
Model: Zabbix v5.0.17
Mode: GUI [Graphical User Interface]
Description: In this article, we will discuss a stepwise GUI method of how to add a host or device into Zabbix over SNMPv2 to monitor numerous parameters of a network and the health and integrity of servers and/or network devices. You could Add FortiGate firewalls into Zabbix System.
Introduction
Zabbix is an open-source software tool to monitor IT infrastructure such as networks, servers, virtual machines, and cloud services. It collects and displays basic metrics. Zabbix is designed primarily as an IT infrastructure monitoring tool. Zabbix is free software that does not require an additional license to use any of its features.
Refer to the article if you are facing SNMP issues with FortiGate HA management interface
Steps to add host into Zabbix Monitoring system
Step1: Login
Login to the Zabbix system

Step2: Configuration
Navigate to the “Configuration” and then to “Hosts” as shown below in the image.

Step3: Create Host
Click to “Create Host” to start adding new host to Zabbix

Step4: Hosts
Add the details of the host which needed to add to the Zabbix monitoring system. Follow the steps mentioned below and shown in the picture
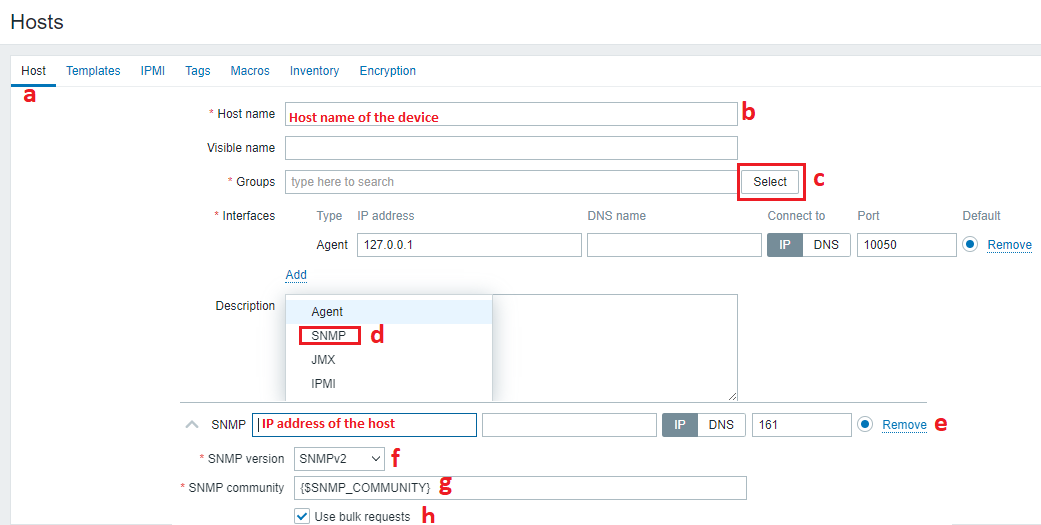
a: As soon as you will click “Create Host” you will navigate to Host page
b: Enter the Hostname of the device which you want to add to Zabbix monitoring system
c: Select the group of the device. e.g. Network, Servers etc
d: Click “Add” and then select “SNMP“
e: Put the IP address of the host you want to add to the Zabbix
f: Select the SNMP version
g: Use “{$SNMP_COMMUNITY}” as SNMP Community
h: Check the box “Use bulk requests“
Step5: Template
Click “Select” and add the related template for SNMP

Step6: IPMI
Leave the details as it is. No changes required here unless you want to customize IPMI settings.

Step7: Tags
Tag the device if you want. You could leave this step unchanged as well.

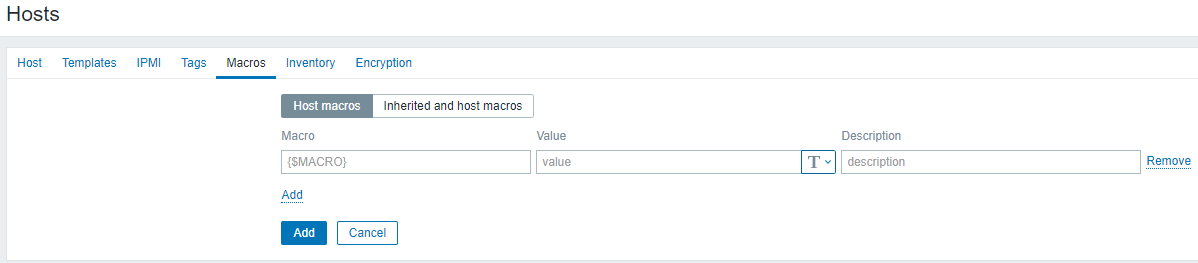
Step8: Macros
Add the SNMP macro and the SNMP community string. SNMP macro will be here “{$SNMP_COMMUNITY}“
Step9: Inventory
Leave this step unchanged.

Step10: Encryption
Leave this step as it is, unless you need a particular encryption
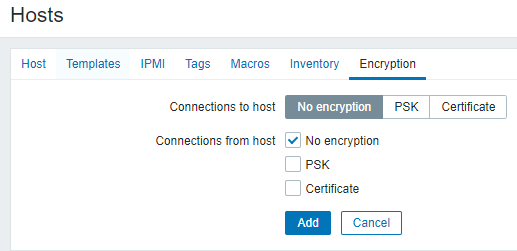
Step11: Add
Finally click “Add” to add the host into the Zabbix system

If you have not got any error while clicked to “Add” the host must have been added to Zabbix.
Other important Topics
- How to Configure SNMP on Cisco ASA 5500-X Firewalls
- SNMP Issue With Cisco ASA IOS 9.14.x
- Configure Redundant or Backup WAN/ISP Link on Cisco ASA – GUI
- SSH Connection Error To Cisco ASA Firewall
- Unwanted ASA Failover Due To SFR Error
Source: Knowledge Base, Lab, Zabbix
EA00160