
Scenario:
Make: Cisco
Model: Cisco ASA 5500-X [ASA 5506-X, ASA 5506 W-X, ASA 5508-X etc]
Mode: GUI [Graphical User Interface]
Description: In this article, we will discuss the stepwise method of how to configure SNMP on Cisco ASA Firewalls. This configuration method is valid for 5500-X series ASAs.
Introduction
SNMP stands for “Simple Network Management Protocol“. It is used for collecting and organizing information about managed devices on IP networks and for modifying that information to change device behaviour. Three significant versions of SNMP have been developed and deployed. SNMPv1 is the original version of the protocol. More recent versions, SNMPv2c and SNMPv3, feature improvements in performance, flexibility and security. Here we will discuss all three versions of SNMP.
Configuration
Step1: Login
Login into the ASA using the Username and Password.

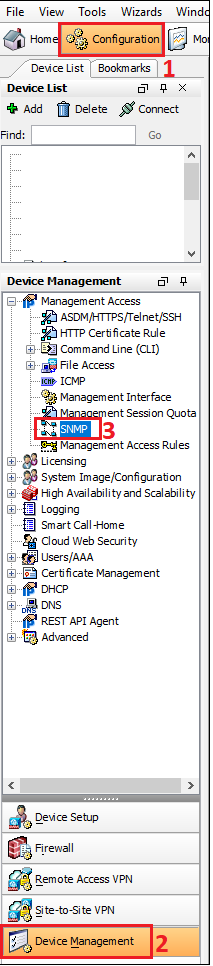
Step2: Access SNMP
Navigate to “SNMP” through “Device Management” under the “Configuration” tab. Follow the steps as shown below in the image.
Step3: SNMP Configuration
In the SNMP tab, fill in the details as per the instructions. Follow the steps shown below in the image.
- Community String: Fill in the SNMP community string
- Contact: Add the contact details
- ASA Location: Add the location of the ASA
- Click “add”
- Interface Name: Select the interface you would like to use for the SNMP poll/trap.
- IP Address: Add the IP address of the SNMP Server
- UDP Port: Select UDP port 161 or 162.
- Community String: Put the community string, it could be read-only or read-write.
- SNMP Version: Select the SNMP version 1, 2c or 3
- Poll or Trap: Select the option Poll or Trap or both
- Press “OK” to implement the change
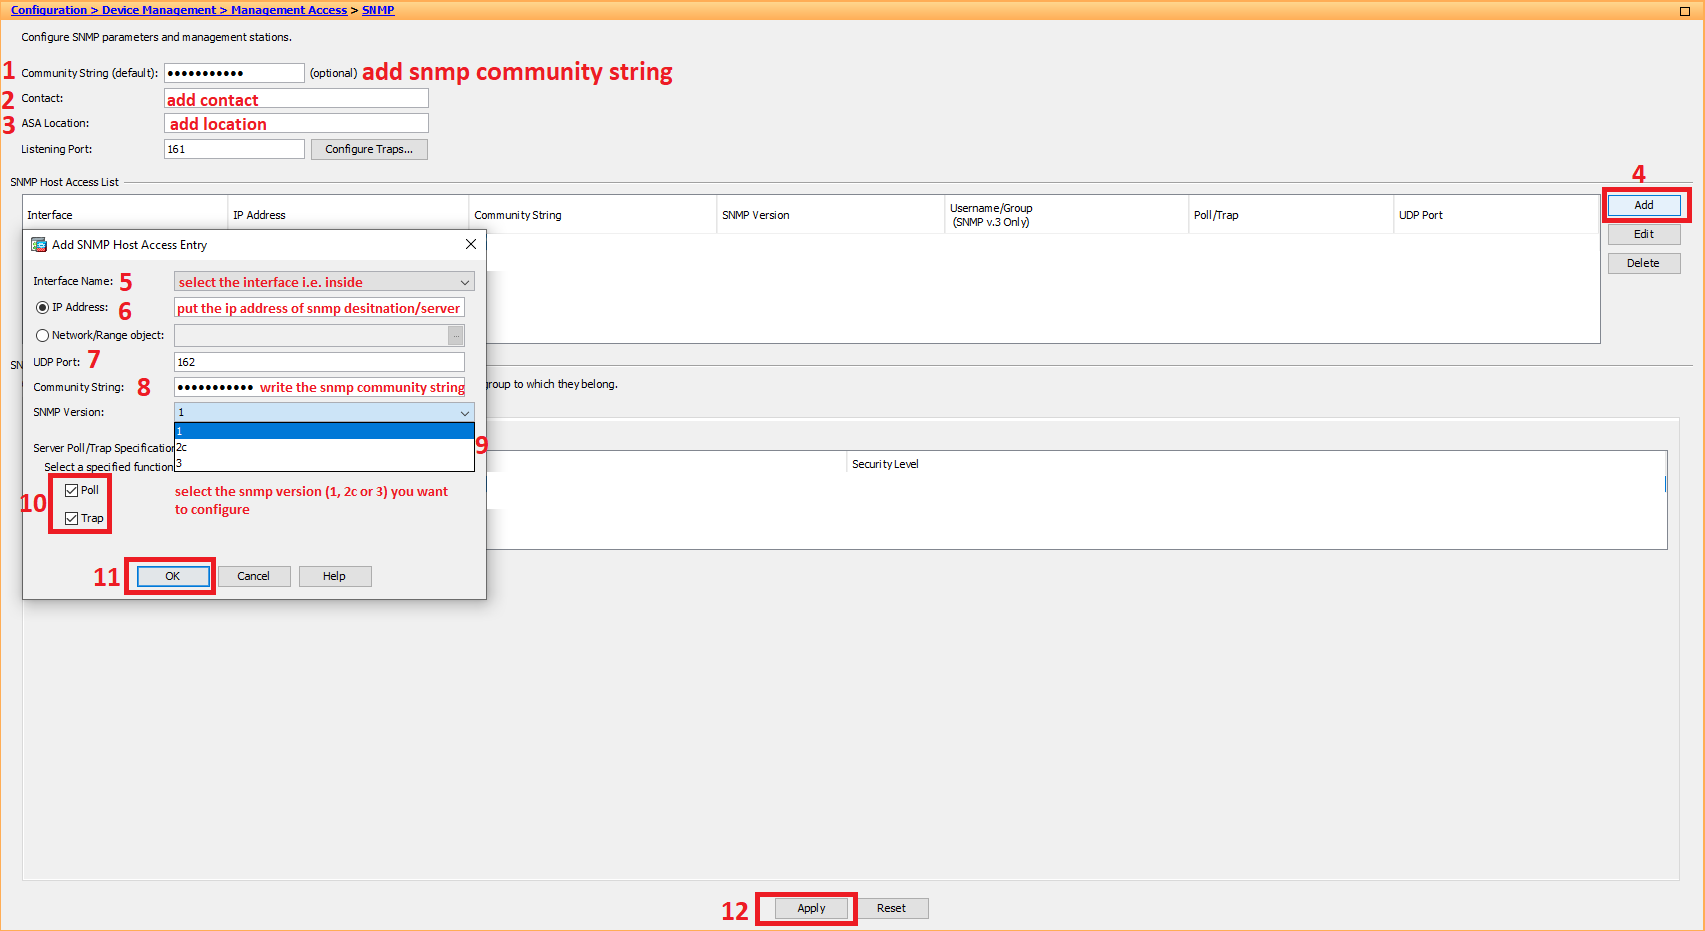
If you want to configure SNMP version 3 then you will also have to configure the Username or Group. Follow the steps shown below
Step4: USM Model
Configure the USM Model as shown below in the image. Select the Group Name (could be anything as per your preference) and Security level.

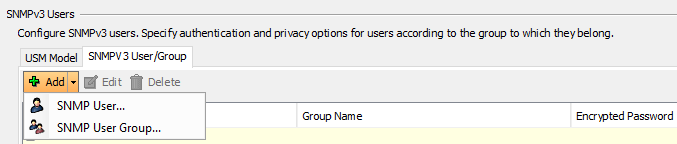
Step5: User or Group
Create SNMPV3 User or Group as shown below in the image
SNMP is configured on the Cisco ASA Firewall.
Other ASA Firewall topics
- Cisco ASA Site-to-Site IPSec VPN Tunnel Configuration-GUI
- Configure SSH On Cisco ASA Firewalls GUI
- SSH Connection Error To Cisco ASA Firewall
- Configure ASDM Access On Cisco ASA Firewall CLI
- Cisco Firewall or ASA Active/Standby Failover Configuration
Source: Cisco, Knowledge Base, Internet
EA00114