Since August 13, 2021 the password authentication for git cloning was removed and now we all have to use Personal Access Token [PAT] to clone git. If you use a password then you will see the error as shown below. In this article, we will discuss how to generate Personal Access Token [PAT] for Git cloning or push.
edledge-Ubuntu_20.04.5_LTS:~$ git clone https://github.com/edledge/test.git
Cloning into 'test'...
Username for 'https://github.com': git@edledge.com
Password for 'https://git@edledge.com@github.com':
remote: Support for password authentication was removed on August 13, 2021.
remote: Please see https://docs.github.com/en/repositories/creating-and-managing-repositories/
cloning-a-repository for information on currently recommended modes of authentication.
fatal: Authentication failed for https://github.com/edledge/test.git
Refer to the article if you want to understand the different methods of Git cloning.
How to Clone a Repository from GitHub
Personal Access Token [PAT]
Personal access tokens are an alternative to using passwords for authentication to GitHub when using the GitHub API or the command line. There are two types of Personal access tokens 1) Fine-grained personal access tokens 2) Personal access tokens (classic). It is recommended to use Fine-grained personal access tokens whenever possible.
Fine-grained personal access tokens
Below are the few important features of Fine-grained personal access token
- Each token can only access resources owned by a single user or organization.
- Repositories can be restricted on each token.
- Differential permissions can be granter on each token.
- Expiration date is must.
- Organization owners can require approval for any fine-grained personal access tokens.
Personal access tokens (classic)
Below are the few important features of Personal access token (classic)
- Only personal access tokens (classic) can access the GraphQL API.
- Some REST API operations are not available to fine-grained personal access tokens.
- PAT (classic) have write access for public repositories that are not owned by you or an
  organization that you are not a member of.
- Outside collaborators can only use personal access tokens (classic) to access organization
  repositories that they are a collaborator on.
Steps to Create Fine-grained Personal Access Tokens
Step1: Login
Login to the GitHub account using username and password.

Step2: Settings
On the upper right side, click the “Profile Icon” and then click “Settings“. Follow the steps as shown below in the image.

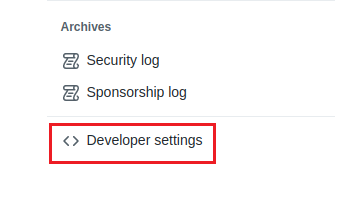
Step3: Developer Settings
On the left side at the bottom, click “Developer Settings“.
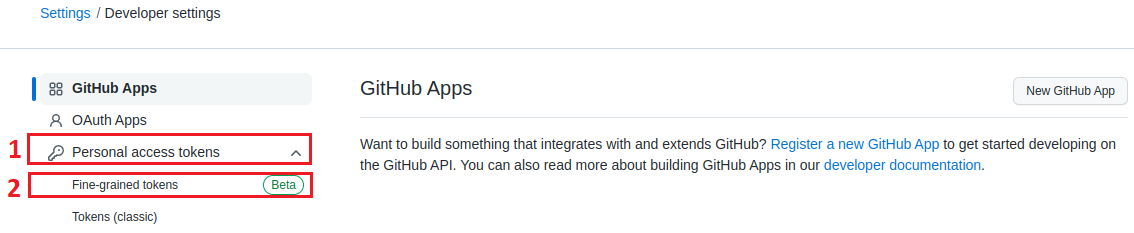
Step4: Fine-grained tokens
On the left sidebar, under Personal Access Token, click “Fine-Grained Tokens“
Step5: Generate Token
Click the tab “Generate New Token“.

Step6: Fill Details
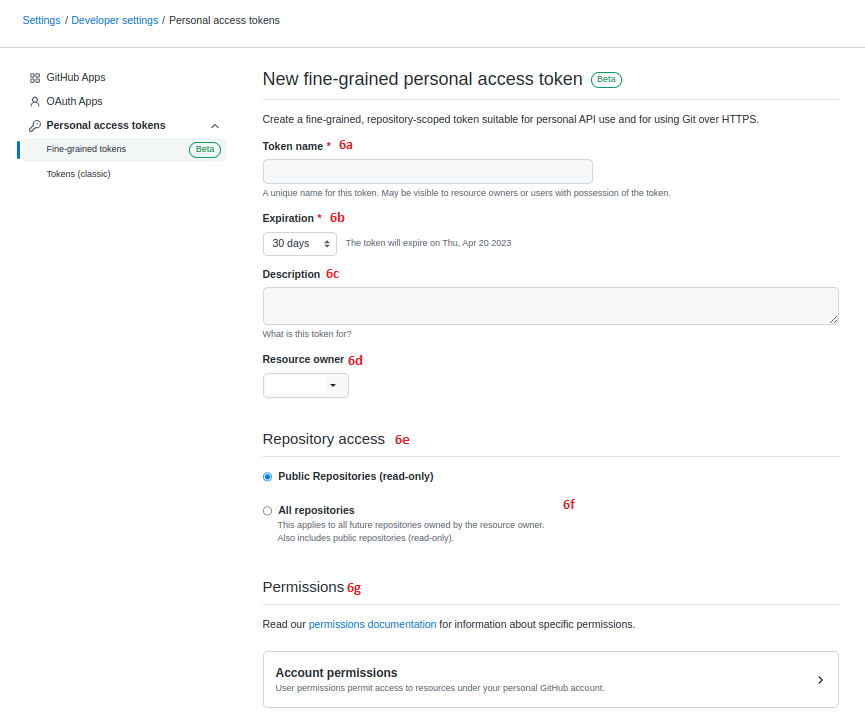
Fill in the required details as shown below in the image
- 6a. Token name => enter a name for the token.
- 6b. Expiration => select an expiration date for the token.
- 6c. Description => add a note to describe the purpose of the token [Optional].
- 6d. Resource owner => select a resource owner.
- 6e. Repository access => select which repositories you want the token to access.
- 6f. If you selected Only select repositories in the previous step, under the Selected repositories dropdown, select the repositories that you want the token to access.
- 6g. Permissions => Select which permissions to grant the token. Depending on which resource owner and repository access you specified, there are repository, organization, and account permissions.
Step7: Generate Token
Once all details are filled then finally click “Generate Token“.

Steps to Create Personal Access Tokens (Classic)
Step1: Login
Login to the GitHub account using username and password.
Step2: Settings
On the upper right side, click the “Profile Icon” and then click “Settings“. Follow the steps as shown below in the image.
Step3: Developer Settings
On the left side at the bottom, click “Developer Settings“.
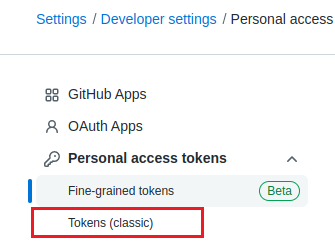
Step4: Token (Classic)
On the left sidebar, under Personal Access Token, click “Token (Classic)“.
Step5: Generate Token
Click the “Generate Token” tab.
Step6: Fill Details
Fill in the required details as shown below in the image
- 6a. Give your token a descriptive name.
- 6b. Set the expiration date.
- 6c. Select Scopes as per the requirement

Step7: Generate Token
Once all details are filled then finally click “Generate Token”.
Other important topics
- How to Install Git on Linux Machines
- How to Install Git on Windows Machines
- Receiving Unwanted Google Account Verification Code?
- How to Reset Microsoft Azure Point-to-Site VPN Tunnel
- How to Configure Microsoft Azure VPN for Remote Connectivity
Source: Knowledge Base, Internet, GitHub
EA00134