Scenario
Make: Ubiquiti
Model: Unifi Controller
Version: 6.0.43
Mode: GUI
Description: This article is to discuss and show a stepwise method to add radius authentication of wireless clients on a wireless SSID in the Ubiquiti Unifi Wireless network.
In this article, the configuration is done on the Unifi Controller running on firmware version 6.0.43 and on the various models of access points like Unifi nano HD, HD, Wi-Fi 6LR, Wi-Fi 6 Light etc. First of all, we would need to add access points to the radius server for host authentication.
Adding Hosts To Radius
Step1: Access Radius Server
RDP to the radius server. Follow the steps shown below.
mstsc ==> Radius server ==> Server Manager ==> Network Policy Server
Step2: Add New Host (access point)
Add the hosts i.e the access points to the Radius Server. Follow the steps shown below in the image.
Right click on "Radius Clients" and then click "New"
Step3: Add host (access points) to the Radius server
Add the details of the host and then save the configuration. Follow the steps as shown below.
Name of the access point - edledge-ap
IP address of the switch - 10.1.1.1
Key - edledge [The same key will be used in the controller under SSID]


Press "OK" to save.
Add Radius To Hosts
Step4: Login To Controller
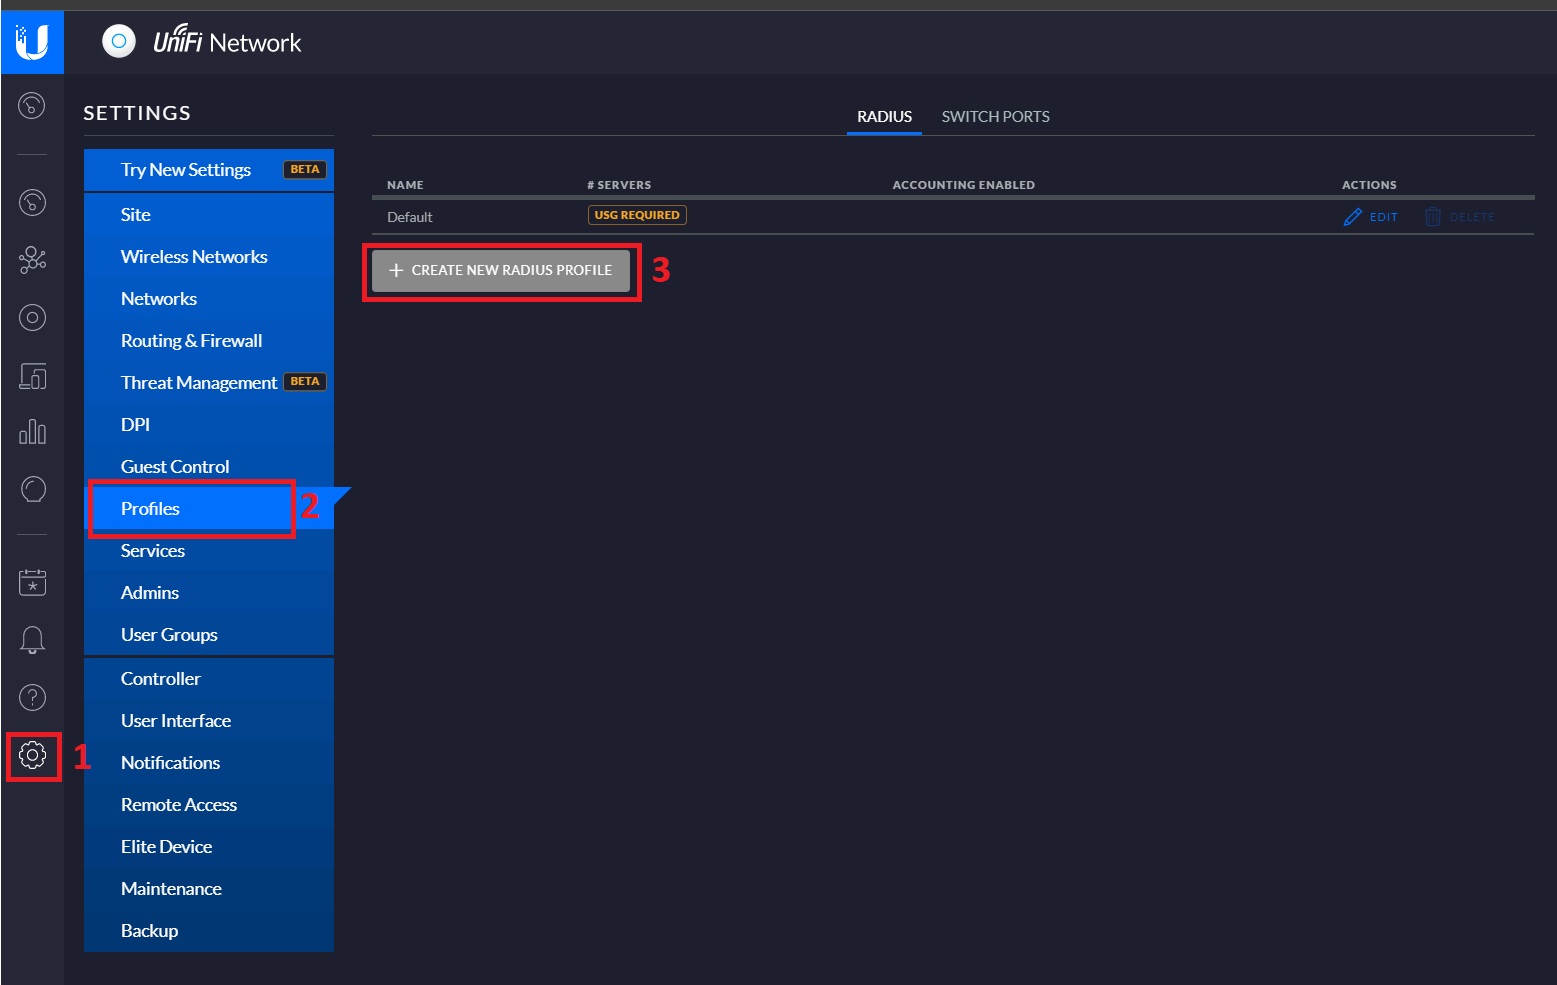
Login to the Unifi controller and navigate to the “Profiles” tab. On the profile page click “Create New Profile” as shown in the image.
Step5: Adding Radius Server Details
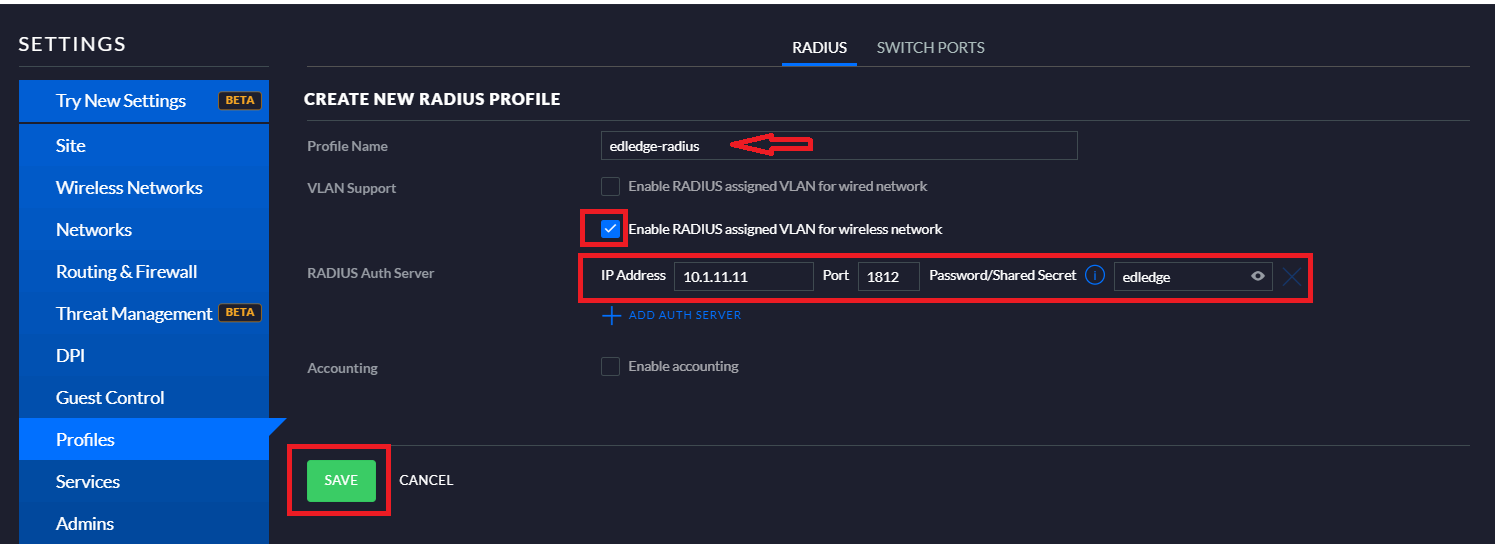
Add the Radius server details along with PSK to the controller. Details are shown below.
Name of the radius server - edledge-radius
IP address of the switch - 10.1.11.11
Key - edledge [The same key will be used in the radius server in step3 above]
Step6: Enable Radius On SSID
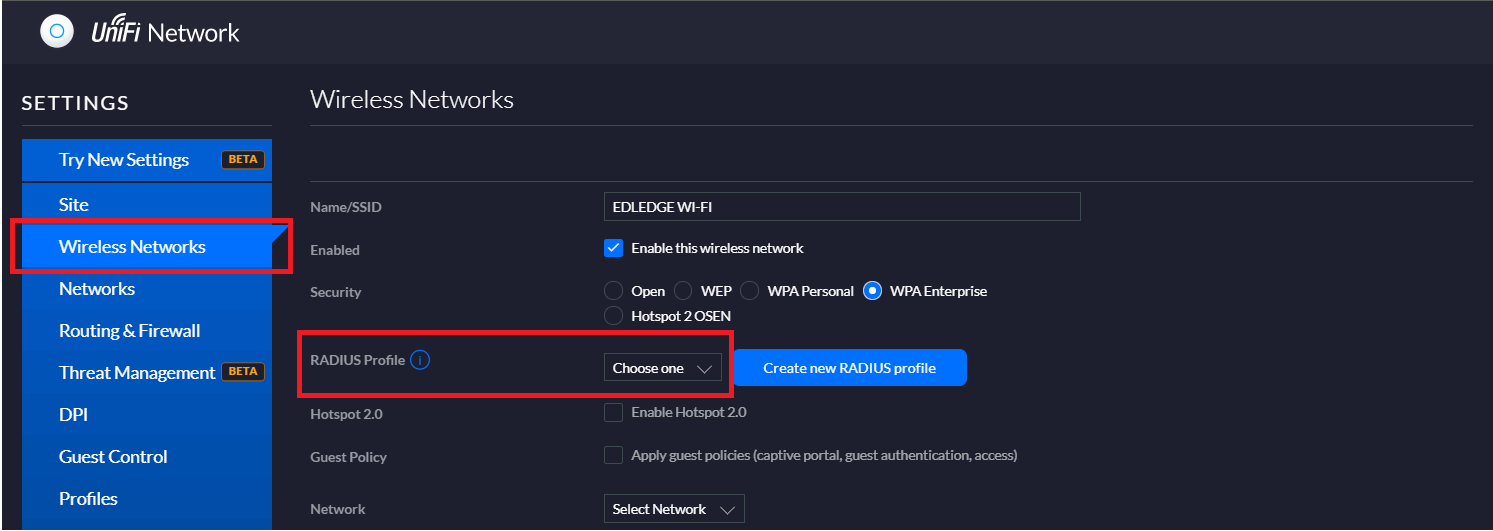
Navigate to setting and then to “Wireless Network“. Select the Wi-Fi SSID on which radius authentication needs to enable. Click “edit” against the SSID and then add radius profile as shown below in the image.
Do not forget to Save the config after selecting the radius at "Radius profile => Choose One" tab
Now Radius Server details are added to the Unifi Controller under an SSID and the access points are added to the Radius server as hosts. Please make sure the PSK [Pre Shared Key] should remain the same in the Radius Server and the Unifi Controller. The Radius enabled SSID should be able to authenticate clients through the Radius server as per NPS [Network Policy Server].
Radius configuration can be done on Cisco switches and Dell Switches. It is always recommended to have a redundant radius server on devices. Radius Fail-over can be configured on Cisco Switches and Dell Switches as well. There are quite a few interesting articles available on this website on Unifi or Ubiquiti devices.
EA00071


