
Scenario
Switch: Cisco 2960, 3650, etc
Server: Radius Server 2012, 2016, 2019
Description: In this article we we will discuss a stepwise method of configure of Two Radius Servers on the Cisco Switch for Radius Failover. This configuration is valid for other Cisco switches as well.
Configuration on Switch
Step1: Configure aaa model
This is important to configure the aaa model on the switch to allow Radius to control Authentication, Authorization, and Accounting.
edledge-switch(config)#aaa new-model
Step2: Configure the aaa group
Once aaa model is configured now we would need to configure the radius group of the Radius server. Add both radius servers on the switch.
Radius Server 1 - edledge-radius01

edledge-switch (config)#aaa group server radius EDL
edledge-switch (config-edledge-radius)# server name edledge-radius01
edledge-switch (config-edledge-radius)# deadtime 1
Radius Server 2 - edledge-radius02

edledge-switch (config)#aaa group server radius EDL
edledge-switch (config-edledge-radius)# server name edledge-radius02
edledge-switch (config-edledge-radius)# deadtime 1
Step3: Configure Authentication, Authorization & Accounting
Configure AAA as shown below
edledge-switch (config)#aaa authentication login default local group EDL
edledge-switch (config)#aaa authentication dot1x default group EDL
edledge-switch (config)#aaa authorization network default group EDL
edledge-switch (config)#aaa accounting dot1x default start-stop group EDL
Step4: Radius Server Details
Now configure both radius server details on the switch. Execute the command as shown below.
Radius Server 1 - edledge-radius01

edledge-switch (config)#radius server edledge-radius01
edledge-switch (config-radius-server)#address ipv4 10.1.11.11 auth-port 1812 acct-port 1813
edledge-switch (config-radius-server)# key edledge
Radius Server 2 - edledge-radius02

edledge-switch (config)#radius server edledge-radius02
edledge-switch (config-radius-server)#address ipv4 10.2.11.11 auth-port 1812 acct-port 1813
edledge-switch (config-radius-server)# key edledge

Save both keys,as same key will be used when this switch (host) will be added to the server.
Step5: Radius Servers Status
Now check and ensure both Radius Servers are added to the Radius group EDL
aaa group server radius EDL
 server name edledge-radius01
 server name edledge-radius02
 deadtime 1
Now time to add a host (switch) to the server so that the Radius server starts authenticating hosts as per Radius Policies.
Configuration on Radius Server
Step6: Radius Server
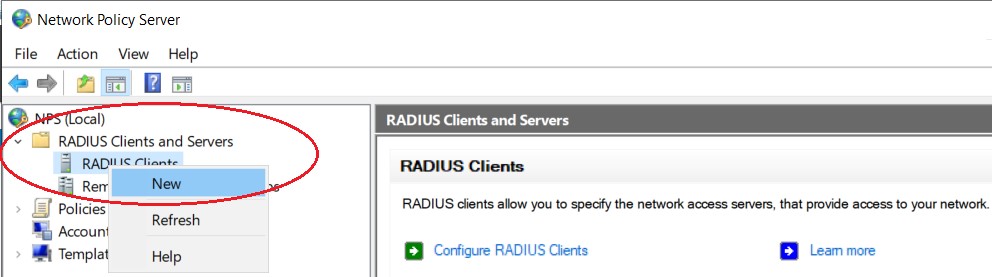
Login to Radius server and open Server Manager and then NPS
mstsc ==>Radius server ==> Server Manager ==> Network Policy Server
Step7: Adding Host
Add host i.e. Switch to Radius Server 1 as shown below.
Right click on "Radius Clients" and then click "New"
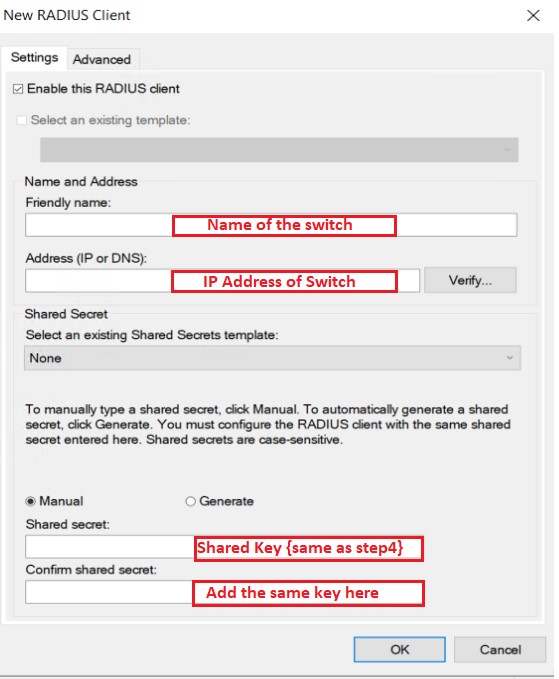
Step8: Add host details
Add host details i.e. Switch to the Radius server as shown below.
Name of the switch-edledge-switch
IP address of the switch - 10.1.1.1
Key - The same key we had used in Step 4 [edledge]


Press"OK"to save.
Step9: Repeat Step8 on Radius Server 2 to add host {switch} details on Radius Server 2
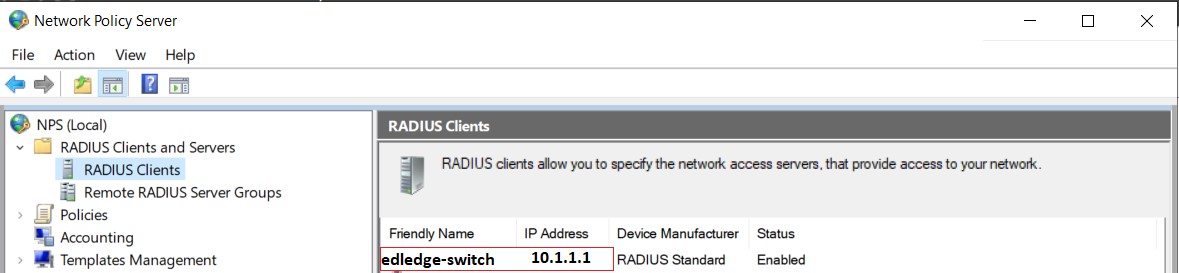
Step10: Confirmation
Ensure hostname with correct IP is now visible in the host file name of both Radius Servers {Radius Server 1 & Radius Server 2}
The switch is all for the test set and added to the Radius server. Make sure the switch is able to ping the Radius server and once Policies are added to the Server, we are good to go. Standalone Radius configuration on the Cisco switch for authentication is explained in the attached article.
Other Important Topics
- How to Change Radius Server Priority on Dell Switch
- RADIUS Bypass/Authorize/Unauthorize On Cisco Switch Interface
- Radius Configuration on Ubiquiti Unifi Wireless Network
- Cisco 2960 Switch Stack or Member’s Firmware Upgrade Failing
- Check & Change SSH Version Of Cisco Switches
Source: Cisco, Lab, Knowledge Base
EA00022