Scenario:
Make: SonicWall Network Adaptive Appliances [NSA]
Model: NSA 6600, NSA 3600, NSA 250M, NSA 2400 etc
Mode: GUI [Graphical User Interface]
Version: 6.5.4.x
Description: This article is to discuss and show a stepwise method to configure a Site-to-Site IPSec VPN tunnel on SonicWall Network Adaptive Appliances [NSA].
SonicWall NSA supports two types of VPN tunnels.
1. Tunnel Interface
2. Site-to-Site VPN tunnel
In this article, we will discuss how to configure a site-to-site VPN tunnel on SonicWall Network Adaptive Appliances [NSA].
Configuration
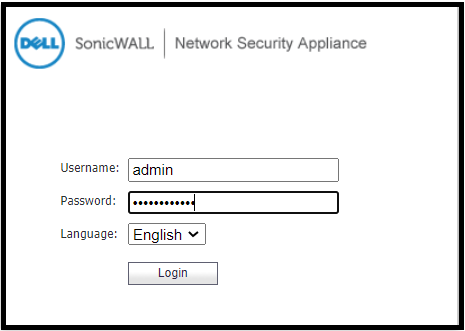
Step1: Login
Login to the SonicWall Firewall [NSA].
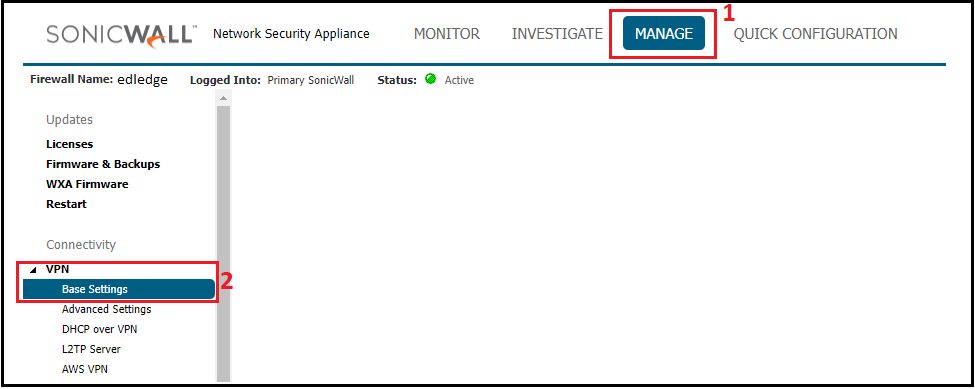
Step2: Navigate To VPN
After login, navigate to the VPN settings. VPN settings are at different positions for the “Contemporary” and “Classic” modes of GUI. Both locations are shown below in the image.
Contemporary Mode
Classic Mode
Step3: Enable VPN
Make sure the Global VPN Settings is “Enabled” and then click “ADD” to configure VPN settings. Refer to the image attached below.
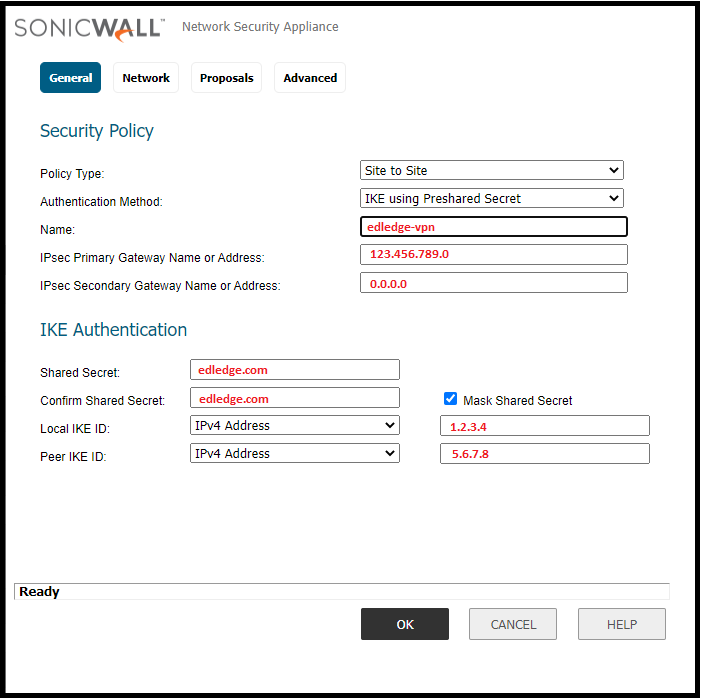
Step4: General
Here we will need to fill in the general details. All sub-steps are mentioned below.
- 4.1 Policy Type: Select the policy type “Tunnel Interface” or “Site-to-Site“
- 4.2 Authentication Method: Use the authentication method. Generally “IKE using PSK” is used.
- 4.3 Primary Gateway: Put the IP address of the remote site.
- 4.4 Secondary Gateway: Put the secondary IP address of the remote site and if there is no secondary IP then use 0.0.0.0
- 4.5 Shared Secret: Generate a secret key. Same secret key will be use at the remote site.
- 4.6 Confirm Shared Secret: Confirm the secret key. The same key used in step 4.5
- 4.7 Local IKE ID: Use the identifier out of available options i.e IP, Domain, Email, Firewall or Key Identifier.
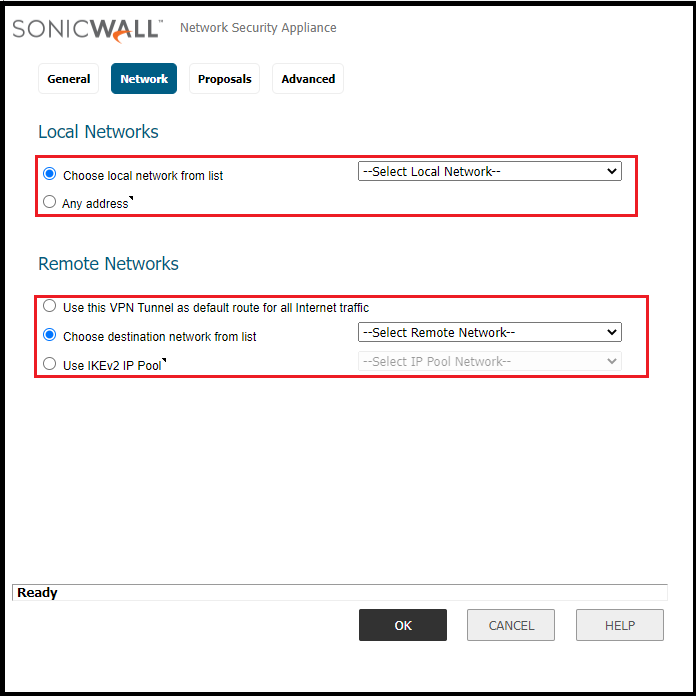
Step5: Network
Select the local and remote network host or subnet for the VPN. Details are mentioned below
- 5.1 Local Network – Create an address object or group for local network which is allowed over VPN. If you want to allow everything then choose “any”.
- 5.2 Remote Network – Create an address object or group for the remote network which is allowed over VPN. You could use default route or IKEv2 IP Pool.
Step6: Proposal
Define the IPSec Proposal as per requirement. Details are mentioned below. Refer the image attached below.
IKE Proposal – PHASE 1
- 6.0 Exchange: Use IKEv1 or IKEv2 as per requirement.
- 6.1 DH Group: Use DH group. Group 1, 2 5 or 14 etc.
- 6.2 Encryption: Select the encryption 3DES, AES-128, AES-192 or AES-256.
- 6.3 Authentication: Select the authentication method SHA-1, SHA-256, SHA-384 or SHA-512.
- 6.4 Life Time: Define Life Time period. By default it remains 28800.
IPSec Proposal – PHASE 2
- 6.5 Protocol: Select protocol AH or ESP
- 6.6 Encryption: Select Phase 2 Encryption AES-128, AES-192 or AES-256.
- 6.7 Authentication: Select Phase 2 authentication method from the available options.
- 6.8 PFS: You could enable or disable Perfect Forward Secrecy as per requirement.
- 6.9 Life Time: Define Life Time period. By default it remains 28800.
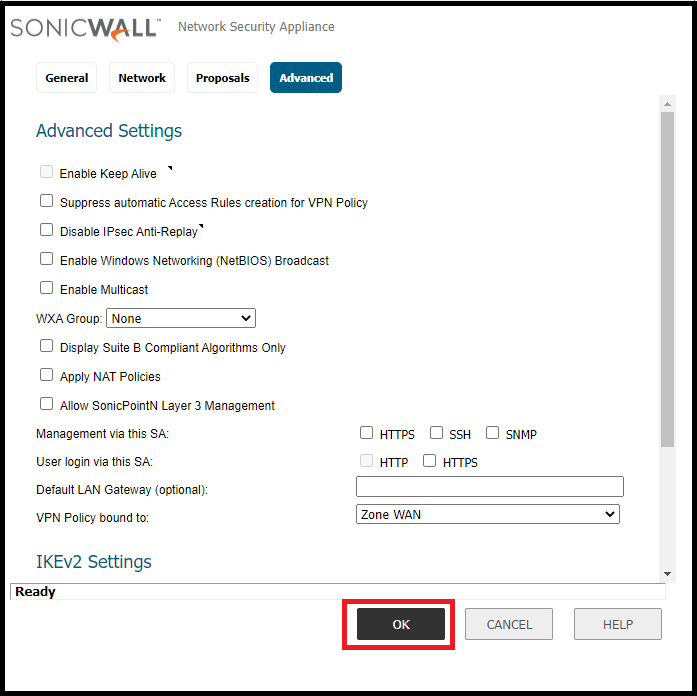
Step7: Advanced Setting
There are many options available in “Advanced Settings“. You could enable or disable as per requirement. After selecting options in the “Advanced Settings” tab do not forget to click “OK” to save and apply the configuration.
After saving the configuration, the IPSec Site-to-Site tunnel configuration is done at SonicWall’s side. Configure the tunnel at the remote site to get VPN working. If you have Sonicwall at the remote site then use the same steps mentioned in this article. You could configure IPSec Site-to-Site VPN tunnel on Cisco Firewall & IPSec Site-to-Site VPN tunnel on Ubiquiti Unifi USG as well.
Recently a security advisory was released by Sonicwall. Do not forget to refer to the link to mitigate the vulnerability.
Source: Knowledge Base, Lab, SonicWall
EA00087

