
Scenario:
Make: Cisco Switches
Model: Cisco 2960, 3650, 3850, 6500, 9000 Series etc
Mode: Command Line Interface [CLI]
Description: In this article, we will discuss the stepwise method of how to configure Port Channel or Channel Group in Cisco switches. This configuration is valid for other models of Cisco switches as well. Port-Channel/Channel Group Configuration-Dell Switches can be done by referring to the linked article.
Introduction
“Ether-channel” is the name of the technology used to group multiple physical interfaces whereas The “Port-channel” is the name of the virtual interface of the Cisco IOS. Refer to the linked article to know more about Port-Channel/Channel Group vs Ether Channel/Link Aggregation.
Configuration
Follow the steps shown below to configure the port-channel or ether-channel on the Cisco switches.
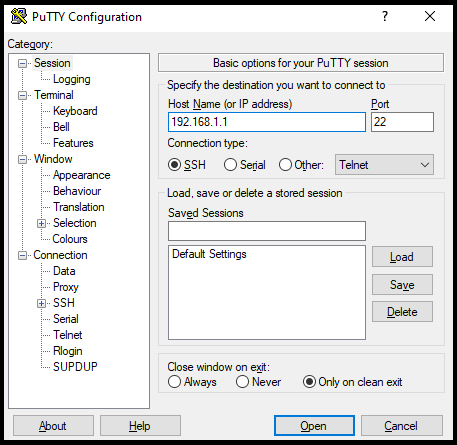
Step1: SSH or Console
Access the switch either by SSH or via Console.
Step2: Login
Log in to the switch using the username and password.
login as: admin
Using keyboard-interactive authentication.
Password:edledge.com

edledge-switch>enable
Password:edledge
edledge-switch#
Step3: Switch Interface
Elect the switch interface which will be used as an ether-channel or will be part of the port-channel.
edledge-switch# conf t
edledge-switch(config)#int gig 1/0/8
edledge-switch(config-if)#channel-group 1 mode active
creating a port-channel interface Port-channel 1
edledge-switch(config-if)#switchport mode trunk
edledge-switch(config-if)#exit
edledge-switch(config)#exit
edledge-switch#
Mode Options
Below are the channel group mode options available. Refer to the link to understand the purpose of different channel modes.
active    - Enable LACP unconditionally
auto      - Enable PAgP only if a PAgP device is detected
desirable - Enable PAgP unconditionally
on Enable - Etherchannel only
passive   - Enable LACP only if a LACP device is detected
Step4: Second Switch Interface
Elect another switch interface that will be part of channel-group or port-channel.
edledge-switch# conf t
edledge-switch(config)#int gig 2/0/8
edledge-switch(config-if)#channel-group 1 mode active
edledge-switch(config-if)#switchport mode trunk
edledge-switch(config-if)#exit
edledge-switch(config)#exit
edledge-switch#
Step5: Port Channel
Configure the Port Channel as per requirement.
edledge-switch# conf t
edledge-switch(config)#int port-channel 1
edledge-switch(config-if)#switchport mode trunk
edledge-switch(config-if)#exit
edledge-switch(config)#exit
edledge-switch#
Step6: Confirmation
Check and confirm if the port-channel is up and connected.
edledge-switch#sh int port-channel 1
Port-channel1 is up, line protocol is up (connected)

edledge-switch#sh int port-channel 1 etherchannel
Port-channel1 (Primary aggregator)

Age of the Port-channel = 0d:0h:5m:14s
Logical slot/port = 9/1 Number of ports = 2
HotStandBy port = null
Port state = Port-channel Ag-Inuse
Protocol = LACP
Port security = Disabled
Load share deferral = Disabled

Ports in the Port-channel:

Index Load Port EC state No of bits
------+------+------+------------------+-----------
0 00 Gi1/0/8 Active 0
0 00 Gi2/0/8 Active 0

Time since last port bundled: 0d:0h:5m:14s Gi2/0/8
Time since last port Un-bundled: 0d:0h:5m:14s Gi2/0/8
Step7: Save the Config
Save the configuration
edledge-switch# wr
Building configuration...
[OK]
It is always recommended to use a secure network. We can enable Radius Authentication On Cisco Switches which will enable authentication through Radius. Refer to the linked article if you are looking to Firmware or IOS upgrade of Cisco Switches. Also, do not forget to refer to the article if Firmware or IOS upgrade is failing.
Source: Cisco, Knowledge Base, Internet
EA00098